
Blob Tracking
This tutorial shows one possible solution for tracking insect paths. The tutorial utlizes the Blob_Tracking module which provides various parameters for connecting blobs on successive images in order to determine movement. The goal of the tutorial is to identify the individual paths of the insects in order to further analyze their interactions and quantify their movement. The path coordinates are provided for external applications to process the results in the desired way.
Movement tracking requires successive images which are best represented in movie files. For this tutorial we use the following raw video file provided by Juan Pablo Busso from the University of Zurich.
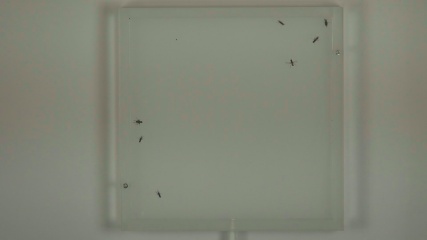
(click to download/view)
As we are working with multiple frames in a video we use the Media Reader module to play the video frame by frame. Note that there are many other modules that can be used to play videos or stream network images. Mutliple modules ensure that many formats can be used within RoboRealm to analyze frames. (Media Reader, VLC_Player, Read_AVI, HTTP_READ, RTSP_Player)
From this video we pick an individual frame to test processing. Prior to tracking blobs we need to prepare the image for best results. While this is not a huge issue, it can cause the moving blobs to be broken into smaller blobs that could not be tracked. By zooming into one part of a single image we see our first problem.
The video signal sampled is from an NTSC source that has interlaced the image. Left and right rows are successively updated with the current live image which causes a broken object in areas of high movement. Interlacing images was common when video transmission capabilities were more limited and while still present today are slowly being replaced by high resolution single image frames.
The solution to this is to use the Deinterlace module which uses various techniques to eliminate the jaggies caused by movement. Using this module our zoomed single image now appears as:
As the insects are contained within a particular area we can Crop the image to just focus on that area the insects will be contained within. Cropping the image to focus on just the area you want to investigate is always recommended since cropping is quick and it reduces the amount of data to be processed in successive modules.
In addition to cropping, we also use the Normalize module to correct the lighting to increase the contrast between the insects and the white background. Given these two additions the image appears as:
We are now ready to extract just the insects from the white background. As we have such a high contrast between the insect and the background we can use the Auto Threshold module to separate foreground and background. Because RoboRealm processes blobs as white objects we select the Black Mask to invert intensities, i.e. black objects become white. While its easy to switch from one thresholding method to another, care should be taken to watch the entire video using any particular thresholding technique. A particular method may work for the current frame but fail in previous or successive frames.
As we are working with relatively small objects we use the Dilate module to help consolidate those insect objects that may be broken due to the thresholding. This ensures that bug parts are combined into a single representative blob.
We still have some parts that are not actual insects. In the upper right corner there are two black dots that are not insects and stationary. We can remove those using the Blob_Size module since they are smaller than the actual insects. While these would remain still and would be ignored during tacking, we chose to remove them prior to tracking.
As we now have a black and white image, we can finally use the Blob Tracking module to connect the blobs in each frame with the frames before. There are many options to chose from in terms of how to associate a blob with its previous image blob. In our case, the insects move quite a bit from image to image so checking for overlapping blobs will not work for the fast moving insects. Instead we use the Location or Proximity and Size attribute to connect blobs. The location assumes that blobs that are closest to previous blobs are the same blob. The Blob tracking module is able to determine the correct association by analyzing all blobs in the image for their best match. Thus if a fast moving insect moves close to a stable insect, the global solution will determine that the stationary insect will not match to the fast moving one. We use the size attribute at a diminished weight (25%) to ensure that in situations where two fast moving insects cross each others path the actual size of each insect will help resolve the ambiguity.
Your specific project may require additional attributes to be considered in order to resolve ambiguities. A simpler solution for this tutorial would be to increase the frame rate of the camera to capture smaller movements. The location/proximity measure will then become more effective due to the smaller movement and the overlap attribute might become valid.
 While experimenting, be sure to have the module set to label colors. This will color each blob with a distinct
color that if suddenly changes indicates that the tracking was lost for some reason. Slowing down the Media Reader
(or VLC or AVI_Reader or ...) to play frames slower can help provide some insight as to why tracking may have
been lost.
While experimenting, be sure to have the module set to label colors. This will color each blob with a distinct
color that if suddenly changes indicates that the tracking was lost for some reason. Slowing down the Media Reader
(or VLC or AVI_Reader or ...) to play frames slower can help provide some insight as to why tracking may have
been lost.
A couple frames from the playback show the growing paths of the insects:
The module monitors the VIDEO_FRAME variable (selected in the interface) to check when the video loops. Once it does, the tracking information is cleared and restarted. This ensures looping video is processed correctly by restarting the tracking on each loop.
Once the information is generated, you can export the path point data for each object using the Write Variables module. By inserting the BLOB_TRACKING variable into that module a CSV file will be generated that contains the movement in each image frame. The format of that variable is BLOB_ID, BLOB_X, and BLOB_Y which means that after the full run we will have all path points of each blob and also in what frame they moved.
BLOB_TRACKING
10;30;380;2;74;410;11;56;535
10;39;385;2;77;409;11;58;534
10;39;384;2;76;406;11;57;534
10;40;382;2;75;406;11;56;533
10;54;377;2;79;405;11;55;533
10;74;373;2;85;411;11;60;540
 Once tracking is complete, we may want additional statistics about the tracked blobs beyond what the
Blob_Tracking module provides. In this case, we add the Geometric_Statistics
module that generates an AREA array of the number of pixels in each blob. Note, we add this module just
AFTER the Blob_Tracking module (with Annotation enabled) to ensure that we see the same image as the
Blob Tracking module. This is
necessary since the two modules need to see the same blobs in the same order otherwise we cannot correlate
the Blob_Tracking ids with the Geometric_Statistics array. As the Blob_Tracking module can remove blobs
(Remove Un-Tracked option) its important to process the same image in order to get the blob order correct.
Once tracking is complete, we may want additional statistics about the tracked blobs beyond what the
Blob_Tracking module provides. In this case, we add the Geometric_Statistics
module that generates an AREA array of the number of pixels in each blob. Note, we add this module just
AFTER the Blob_Tracking module (with Annotation enabled) to ensure that we see the same image as the
Blob Tracking module. This is
necessary since the two modules need to see the same blobs in the same order otherwise we cannot correlate
the Blob_Tracking ids with the Geometric_Statistics array. As the Blob_Tracking module can remove blobs
(Remove Un-Tracked option) its important to process the same image in order to get the blob order correct.
To perform the annotation we use a VBScript module to create an array of X, Y coordinates for each blob followed by a Text string of "Area: Z" which can be used in the Display_Text module to display an area value above each blob.
The key to this array is that
BLOB_TRACKING_IDS - array created from blob tracking with zero entries for non-tracked blobs
AREA - array created from Geo Stats module of each blob
are two arrays generated by different modules but are in the same order. Most modules in RoboRealm analyse the image from the left to right, bottom to top order. As long as the same image is used in both modules, the ordering of blobs WILL be the same. Given these two arrays, we know have enough information to correlate a blob id with its area.
ids = GetArrayVariable("BLOB_TRACKING_IDS") ' from blob tracking'

area = GetArrayVariable("AREA") ' from Geo Stats module'

if isArray(ids) then
  if ubound(ids) > 0 then

		ReDim areaList(ubound(ids)*3)

		j = 0
		for i = 0 to ubound(ids)
			if ids(i) <> 0 then
				areaList(j) = GetVariable("BLOB_TRACKING_" & ids(i) & "_X")
				areaList(j+1) = 20 + GetVariable("BLOB_TRACKING_" & ids(i) & "_Y")
				areaList(j+2) = "Area: "&area(i)
				j=j+3
			end if
		next

		SetArrayVariable "AREA_LIST", areaList

  end if
end if
Note that with any solution it is very important to test enough images to validate correctness. Testing on only a couple seconds of video is not sufficient for a reliable solution.
Download the ![]() Blob Tracking robofile to see the steps
and more about the modules used. You can download the original video
used in this tutorial here.
Blob Tracking robofile to see the steps
and more about the modules used. You can download the original video
used in this tutorial here.
The End
That's all folks. We hope you've enjoyed this little adventure into an application of machine vision processing. If you have any questions or comments about this tutorial please feel free to contact us.
Have a nice day!
| New Post |
| Blob Tracking Related Forum Posts | Last post | Posts | Views |
| None |