
Digital Reader
This Digital Reader tutorial shows how to use a camera to read a digital device that may not have a computer interface. This is especially useful for older devices that do not provide an interface to modern computers but do have a human visual readout.
In this tutorial we use a regular air-condition sensor that one may find in any office or home. In the setup we use a DLink DCS900 camera mainly because it has an attachment that allows a large tripod to be connected to the camera and can transmit the image wirelessly to the base computer that is interpreting the image viewed.
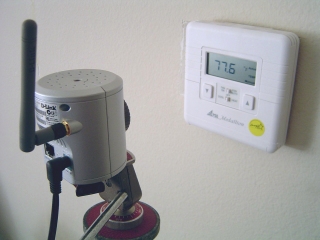
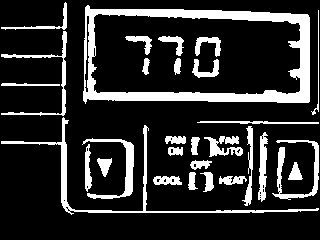
First left us have a look at what the camera is seeing in order to begin our analysis ...
Camera View
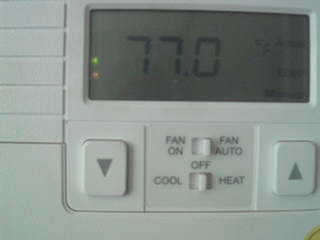
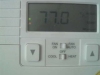
On viewing the image it become immediately apparent that the lighting is not ideal in this situation. Even for humans the digital numbers (in this case 77.0) are hard to read.
The first task is to segment the digits from the rest of the scene. Note that there are many ways to accomplish this task and the specific modules you may use may differ from this approach.
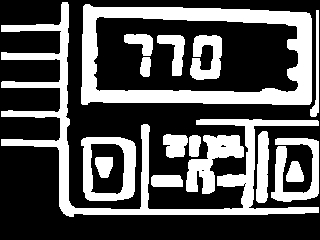
To begin our segmentation we need to remove the lighting issue. To do this we use the Adaptive_Threshold module. Adding this module converts the above image to:
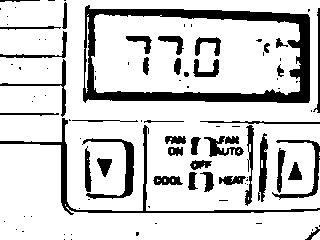
The parameters of the adaptive thresholding should be set to approximately the width of one of the digits in order to extract out the digit. We found 20 to be an appropriate window size.
One can easily see that the adaptive threshold does a great job of eliminating any lighting issues and highlights the digits from the background.
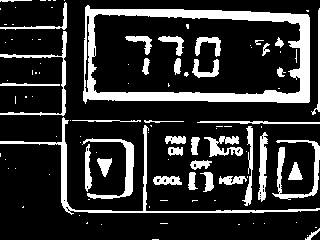
But you can notice we've still got some cleanup to do ....
Image Cleanup
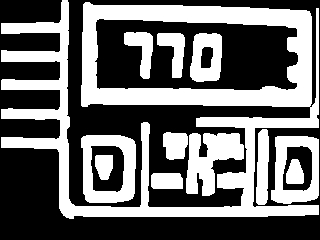
First off you will notice that within the image the digits are black. In order to process them correctly going forward we need to be manipulating white objects as RoboRealm considers white pixels as foreground and black ones as background. All the following modules use this assumption as the basis for their processing. To remedy this situation we simply invert the image. Using the negative module.
Now that the digits are in the correct color we can continue by removing all blobs (connected pixel groups) that are smaller than 70 pixels. The choice of 70 is largely arbitrary but it should be a number where most of the smaller insignificant objects are removed. The actual size will naturally depend on your situation.
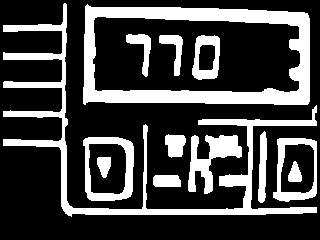
The digits are now appearing more clearly but due to the original low lighting that the image was taken in the border of the digits is not very smooth. To smooth things out a little we use the Smooth Hull module to round out the digits' shapes.

But you will notice that we still have a rather big issue. The digits themselves are broken into two blobs. In order to best match blobs we need to combine the digits into a single blob ...
Merging Blobs
To merge the blobs we need to expand all white parts of the image until they touch with nearby parts. An easy way to do this is with a combination of erode and dilate modules. We first perform a 2 pixel dilation in all directions.
This helps to connect the digits but in some situations a thin line still separates the digits. If we continue to use the dilate module we risk the chance of digits being merged into each other. So instead of using the dilate module to dilate in all directions we simply specify the expansion to only happen in the vertical direction.
Now that the digits have been merged we reduce them closer to their original size by using the erode module with a 2 pixel erosion.
This reduces the digits down to a more visually appealing size.
Once the digits have been segmented from the original image we now need to understand the digit properties as represented by blobs to help eliminate other objects in the image that are not digits. This helps to reduce the clutter in the final stages and provides a more stable result.
You can notice that the digits appear within a square rectangle. This rectangle was initially formed by the white casing in contrast to the lower light LCD part of the panel. We can use this characteristic to better focus on just the digits. To do this filtering we use the Blob Filter module with a single 'inner' parameter.
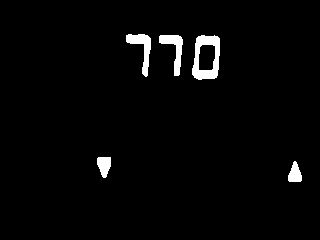
You will notice that while helpful there are still two triangles left in the image. We could use the blob filter to further filter based on triangles and invert that selection to remove them but instead we will use the final step to eliminate those objects.
Shape Matching
To recognize which digit is which, we have to compare the resulting objects with a known database of objects. This known database is simply a folder that contains images of each of the separate shapes to be recognized. The folder we used contains the following images:


This database of images was generated by cutting the final image generated up to this point and manually separating each digit into its own file. This was done by pressing CTRL-C inside RoboRealm when the appropriate image was seen and pasting the image (CTRL-V) into our favorite paint program to then crop and save each image into its own file. Note that the image filenames were specified as 0.gif, 1.gif, 2.gif, etc. in order to make the image to numeric translation easy.
This database was then trained by the Shape Matching module which matches each resulting object to a single file in the database. The confidence and size filters within the Shape_Match module were then used to trim out any bad matches such as those against the remaining triangles.

Note that the digits displayed at the top of each green box is actually the filename of the image matched. Since we named the database images with the digit they represent it is easy to translate the image name into the actual number. In order to do the final grouping we need to use a little VBScript to combine the separate objects together to create the final number.
VBScript
Each recognized shape now represents a single digit. We need to use the shape information to create a single "temperature" variable that contains the final number. We do this by using the VBScript module to combine the information produced by the Shape_Match module in the SHAPE array.' that was created by the shape_match module
shapes = GetArrayVariable("SHAPES")
names = GetStrVariable("SHAPES_PATH")
' temp will hold the final temperature number
temp = ""
if isArray(shapes) then
' be sure we have found enough digits
if ubound(shapes) >= 26 then
' step through all objects and merge
' the number they represent
for i=0 to ubound(shapes)-1 step 9
nstart1 = shapes(i+7)
temp = temp & mid(names, nstart1+1, 1)
' we artificially put back in the period
' as we know where it should be
if i = 9 then
temp = temp & "."
end if
next
' and finally create a variable that represents
' the text that we see. Note that this only
' gets set when enough digits are recognized
setvariable "temperature", temp
end if
end if
On executing this script a new variable "temperature" is produced that contains the recognized temperature digits.
Videos
 (362 KB) 10 second video of the original temperature images.
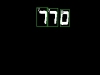 (688 KB) 10 second video of the processed results of the temperature images.
Notice how the shapes wiggle in the processed video but seem stable in the original? This is due to low lighting noise that causes the adaptive threshold (first module) to make different decisions as to what is part of a digit and what is not. As this decision affects the final shapes of the digits they will appear to wiggle when viewed as live video. You will also notice that at times the digits will not match or accidentally become merged with other digits that cause the matches to fail. Again this is due to lighting creating noise in the final results.
Pipeline
The following is the processing pipeline as seen within RoboRealm to accomplish the digital reading.
Notes:
1. You will need to train the Shape_Match module on a folder that contains the database of images to be matched. You can do this by copying all the images into a single folder, edit the Shape_Match module, press the train button, change the path to your folder and press start.
2. You can view the final "temperature" variable by adding in a Watch_Variables module or by editing the VBScript module and focusing on the second variable column.
Your turn ...
Want to try this yourself? Following is the robofile that should launch RoboRealm with the original image we used in this tutorial. You can click on each of the steps in the pipeline to review what the processing looks like up to that point.
![]() Download the Digital Reader robofile. Don't forget
that you may need the folder of digits if you want to replicate exactly what we did. You can download that
here.
Download the Digital Reader robofile. Don't forget
that you may need the folder of digits if you want to replicate exactly what we did. You can download that
here.
The End
That's all folks. We hope you've enjoyed this little adventure into an application of machine vision processing. If you have any questions or comments about this tutorial please feel free to contact us.
Have a nice day!
| New Post |
| Reading Digital Displays Related Forum Posts | Last post | Posts | Views |

Hello, i have an issue with making everything right by your tutorial. On the screen you can see tha... |
9 year | 4 | 4160 |