
WowWee Rovio
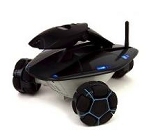 The Rovio module provides an interface from RoboRealm to the WowWee Rovio robot. Using the
module you can command the robot
to respond to images seen from the Rovio robot. The robot sends images over
802.11 (WiFi) to a PC. The PC is running RoboRealm that accesses that video stream, processes the
video as per your needs and then sends the resulting motor commands back to the robot also
using 802.11. Using this technique you can control your Rovio robot from your PC and use
the full power and flexibility of your PC to control the Rovio robot. This allows you to extend
the functionality of the Rovio robot beyond its original limitations.
The Rovio module provides an interface from RoboRealm to the WowWee Rovio robot. Using the
module you can command the robot
to respond to images seen from the Rovio robot. The robot sends images over
802.11 (WiFi) to a PC. The PC is running RoboRealm that accesses that video stream, processes the
video as per your needs and then sends the resulting motor commands back to the robot also
using 802.11. Using this technique you can control your Rovio robot from your PC and use
the full power and flexibility of your PC to control the Rovio robot. This allows you to extend
the functionality of the Rovio robot beyond its original limitations.
Be sure to have updated your Rovio firmware and are running at or above firmware 5.03 (stable) if you find any issues between the RoboRealm module and the
Rovio. For example, if your video has more than 1 second lag between the actual time and the time the image
is displayed or if you lose connection with the Rovio after 60 seconds be sure to update the firmware. You can
download the lastest version which includes these fixes from RoboCommunity which used to be online
at http://www.robocommunity.com/download/15224/Rovio-firmware-UI-v5.00b10-Beta/
Interface
Instructions
1. IP Address - specify the ip address of the Rovio. This can be determined by using the default address or by checking your wireless router to see what IP address has been assigned to the Rovio robot.
2. Username / Password - specify the username and password for the Rovio.
3. Connect - press the connect button to connect to the Rovio and start streaming video.
4. Manual Move - to test the motors on the Rovio you can use the Manual move buttons to move the robot in the specified direction. Note that the robot will continue to move for as long as the buttons are pressed. The middle button stops the robot.
5. Speed - to make the robot move quicker when using the manual move buttons you can select a faster speed. Note this speed adjustment are just used for the manual move buttons.
6. Video - to change the video parameters select the appropriate dropdown box. There will be a slight pause as the robot updates its internal parameters before video resumes. Changing Resolution will change the image size streamed from the robot. Quality will change the compression rate of the video being sent. Low will produce high compression resulting in a small video size, High will induce very light compression and therefore high bandwidth requirements but with high quality images. Framerate determines the maximum number of images that are send each second. Brightness effects the lighting level of the camera. Note that this parameter is set to the maximum setting. The image will appear dark in an evening type of setting. We recommend you use the robot in a high lighting environment.
7. Enhance - To help reduce the lighting issues you can ensure that the Enhance checkbox is selected which will attempt to realign the image colors and intensity in order to create a more pleasing image. This will not affect images with good lighting but should substantially improve those with bad.
8. Movement Variable - you can select a variable that contains one of the command numbers that will cause the robot to move in the specified manner. Note that this also includes the value to move the camera head up and down.
9. Variables - shows the different numbers being read from the robot. The Tick variables are from the wheel encoders and indicate how much a wheel has turned. Radar is the value of the IR obstacle detection (0 = no object, 1 = object). Charging indicates if the robot is being charged (i.e. it is docked). X, Y, and theta reflect the robots location within a room where the overhead beacon can be seen. Note that the values will fluctuate even when standing still.
10. Sound - To test the audio playback on the Rovio select on the RTTTL songs and press the play button. The song will then play on the Rovio. To programmatically play a song select a variable that will contain the name of the song to play. Be sure to only specify this once otherwise the songs will overlap on each other (not a great audio experience!). You can adjust the volume of the sound by adjusting the slider bar left to lower the volume and right to increase it. If you want to add songs you can edit the music.rtttl file in the RoboRealm installation folder and add in your own ringtone songs or sounds.
11. Battery - The battery level is indicated by the progress bar below and the actual current value. To programmatically react to the battery value select a variable that will contain the battery value.
12. Other - To dock or set the new home position press on the appropriate button. To programmatically dock or set the home position select a variable that would contain either "dock" or "set home" (without the quotes) that would indicate what action the robot should perform.
13. Head Position - To move the camera head into a different position select one of the appropriate radio buttons.
14. Light - you can test the main Rovio light by pressing the Test button. If you want to control the light via a variable (zero or non-zero value) select that variable in the provided dropdown.
Examples
Please see our tutorials for examples on how to use the Rovio with RoboRealm.
Variables
ROVIO_REAR_TICK - rear wheel encoder value
ROVIO_LEFT_RICK - left wheel encoder value
ROVIO_RIGHT_TICK - right wheel encoder value
ROVIO_RADAR - indicates an obstacle in front of the
    robot (1) or not (0)
ROVIO_X_POSITION - the X position in the room based
    on the overhead IR pattern
ROVIO_Y_POSITION - the Y position in the room based
    on the overhead IR pattern
ROVIO_THETA - the orientation of the robot based
    on the overhead IR pattern
See Also
BrookStone Rover 1.0
Erector Spykee
Xaxxon Oculus
For more information
WowWee Rovio FAQ
WowWee Rovio API
| New Post |
| WowWee_Rovio Related Forum Posts | Last post | Posts | Views |
|
Wowee Rovio Control within AVM Navigator
Hi guys, this is my first post so hopefully i'm posting in the correct area. Firstly let me set th... |
11 year | 3 | 4267 |
|
Wowee Rovio video issue
There seems to be a problem with the video selection with the Rovio interface. I have never been able to s... |
14 year | 2 | 4276 |
 Floor Finder tweaking
I've been working on several techniques to enable my Rovio to wander around my cluttered basement. I am having troub... |
15 year | 5 | 5166 |
|
Crashing
Roborealm now crashes as soon as I try to load up the Rovio Control. This could be caused by some s... |
15 year | 14 | 4753 |

Hi STeven, The Rovio Module in RR 2.0.3.3 seems to be dropping the wifi connection every time I use... |
15 year | 13 | 9270 |
|
How to upload to robot, Rovio- New at this
How to upload to robot, Rovio? I am new at this. Thank you.... |
16 year | 4 | 5038 |