
Object Segmentation
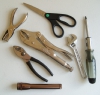
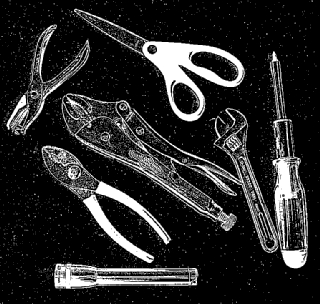
One of the most basic operations in machine vision is to segment objects from the background in order to run specific tests against only those areas of the image that are of interest. When lighting is not ideal, it becomes problematic to deal with shading and highlights especially from metallic parts. This tutorial shows one possible technique for segmenting various tools from a background image with a dominant light in the lower right corner.

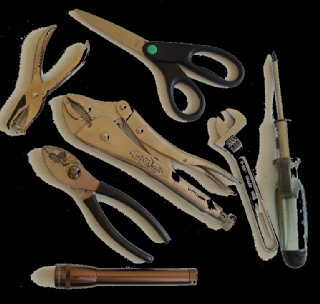
The above image shows the example we will be working with. On initial thought, it may seem that the tools can be extracted from the background using a simple threshold. If we try that at threshold value 168 (manually tweaked) to get the best results, we can see that most of the tool parts are extracted from the mostly white background but as the lighting source comes from the right side a lot of shadows are generated to the left of each object.
Also note that as the threshold removes more of the shadow parts of the metallic tools are also thresholded out. This is not ideal as we want the tools fully extracted from the background.
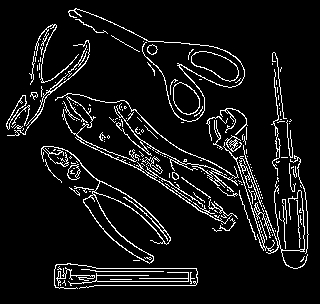
The next thought would be to use an edge detector like the Canny edge detector. Changing the values for the best results Theta at 0.1, Low Threshold 20, High Threshold 40) we get reasonably good results but still are missing large parts of the tools as the lines are not completely connected. Also again due to the shadows some of the lines wander off due to the low threshold value. As the results are promising, there is definitely a need for edge detection as part of the solution. For example, the flashlight (lowest object) is detected well enough for extraction.
Instead of the Canny edge detector, we instead use the Outline setting of the Convolution module. The Convolution module is a generic module that allows us to perform matrix like operations on a image in order to achieve a desired effect. In this case the Outline setting (with a 0.6 divisor to make the results brighter) is used like a high pass filter. I.e. a filter that will highlight noise or edges in an image. This results in a much more grayscale image than what one gets from the Canny module. One can also notice that the shadows are not very prevalent due to the slow intensity changes that constitute shadows.
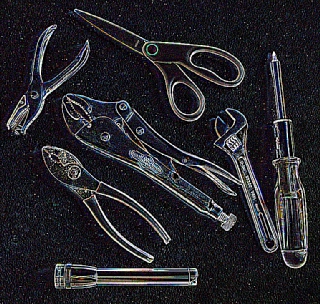
One might be tempted to then use a threshold module on the resulting image to extract just the outline of the tools. This almost works but we found that the ideal threshold level includes a lot of noise (unwanted particles) that cause the resulting outline not to be very well defined.
Instead, we subtract this result from the original image to better define the edges within the original image.

This has the visual effect of improving sharpness of the image. On closer look we can see that the edges of most of the tools has now improved. Combining those edges with the original image allows us to effectively combine more than one edge detection technique in order to detect all edges. The next 'edge' detection technique is a simple threshold at level 63. If we compare this thresholding without the subtraction of the detected outline it becomes clear that the subtraction helps considerably.

We then remove a lot of the extra noise created by the original outline detection by removing those objects smaller than 70 pixels in area.

From here, we connect any dangling lines that are close to each other (<15 pixels away) and use the Close module to connect close parts of the outline.

Because we now have a well connected outline, we can fill in the remaining open areas within the objects in order to create solid blobs. The Fill module does this quite easily.

To see how well we did, we use the Border module to create a border from these objects, color that border and overlay it on the original image. This creates a red outline that indicates the boundary that was found using the above technique.
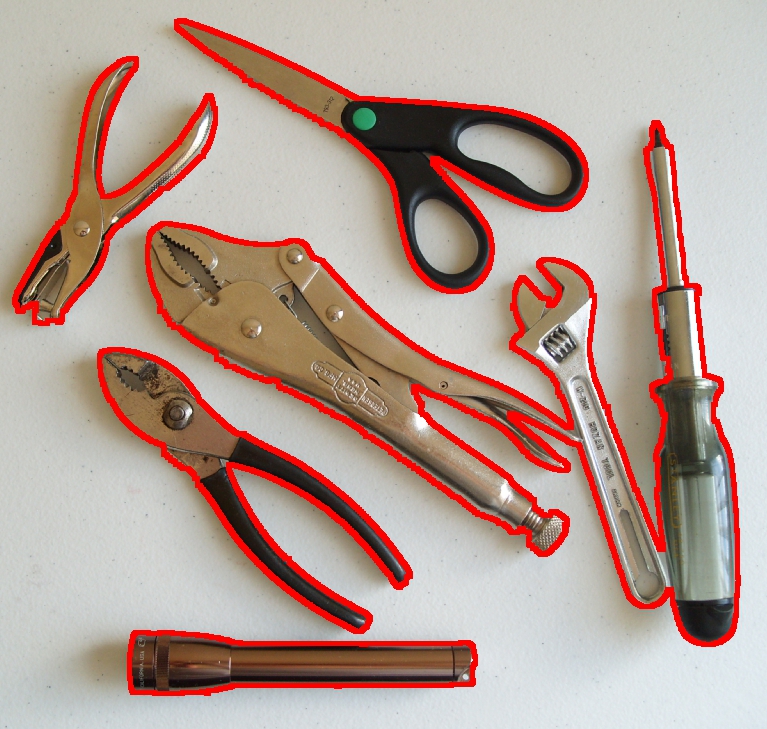
The final results are usable. While not perfect it does a good job on segmenting out the objects from the background. Note that the result assumed that objects do NOT contain inner open areas such as the holes in the scissor handles. In some cases this is ok, in others it is not. Further work would be required to extract out these inner holes or to split the objects that are close together and touching.
Download the ![]() Object Segmentation robofile to see the steps
and more about the modules used.
Object Segmentation robofile to see the steps
and more about the modules used.
The End
That's all folks. We hope you've enjoyed this little adventure into an application of machine vision processing. If you have any questions or comments about this tutorial please feel free to contact us.
Have a nice day!
| New Post |
| Object Segmentation Related Forum Posts | Last post | Posts | Views |
|
how to detect the number inside a square
hi, im doing the project that about using the roborealm to detect few square and inside each square there has different number, ... |
10 year | 2 | 4506 |