
GETTING STARTED
Introduction
The RoboRealm application contains all the tools you need for processing video images for use in robotic applications. It is easy enough for the casual user who wants to experiment with video processing, yet powerful enough for the serious robotic scientist who needs to integrate a vision system into their project.
The heart of the video processor is the image processing pipeline that allows multiple modules (aka image processing filters) to be added in succession to generate the desired results. Combined with the programming logic and control interfaces one can create a visual processing loop that moves a robot according to what it sees. To get an idea on how the application works please watch our Introduction to RoboRealm video.
To try RoboRealm with your own camera and see what it can do
![]() Click here to load a slideshow configuration that will cycle through various filters.
Click here to load a slideshow configuration that will cycle through various filters.
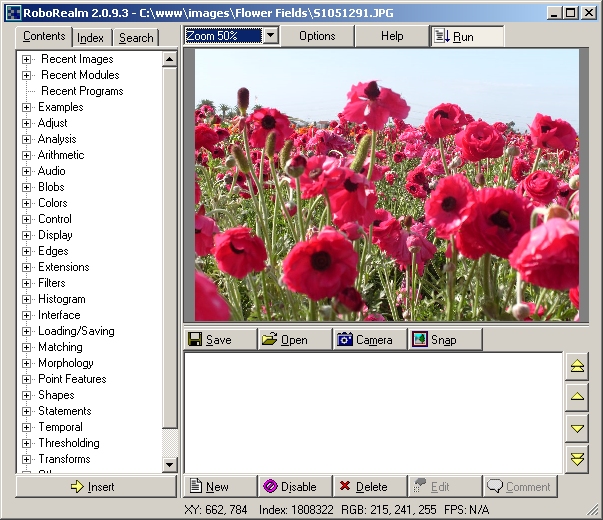
Main RoboRealm Interface
The main interface shows the live video, available functions and the processing pipeline. Adding modules into the pipeline will immediately begin processing of the image. You can reorder the modules in the pipeline by using the up and down yellow arrow buttons.
Theory
The main purpose of RoboRealm is to translate what a camera sees into meaningful numbers in order to cause a reaction to what the image contains. This requires the processing of an image into a few or a single number that is meaningful in the current context of whatever project you have in mind. As each project has vastly different requirements with different attributes that need to be detected, RoboRealm is written in a flexible approach where the basic tools are provided to you in the form of modules in order to be combined into a relevant combination. For example, if your task is to track a red ball then the color red can be picked up by a color filter module as the first step. But if you wanted to track any type of ball then you would not use the red color as an attribute but instead a round shape detector. The reason you would ever want to use a color tracker instead of just using a shape tracker is that the color tracker may be more reliable and repeatable in some environments.
For example, if a red circle is only partially seen a color tracker would easily pick up half of the red ball but a circle detector might not due to the incomplete circle. The choice of which modules to use comes with experience and is very dependant on the environment being sampled. For this reason we regularly will ask for images in the forum as apposed to a description as images will reveal many attributes such as image quality, lighting, color, etc. in the environment.
| Original Image | Red Identified | Circle Identified |
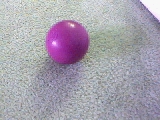 | 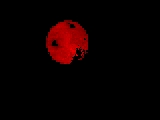 | 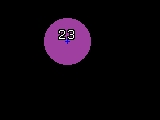 |
The best way to accomplish your processing task is to learn from the tutorials and post an example image in the forum where we and others can help provide meaningful modules that might accomplish the task.
Installation Instructions
- You should have received an email containing a download link to the RoboRealm.zip application after completing the email registration process.
Run the downloaded RoboRealm.exe file. This will launch the
installation program.
- Once installed Double-click on RoboRealm.exe in the installed folder or look for
RoboRealm from you Window Start button, Programs menu, RoboRealm menu. Once you have done this you should see the main interface.
If the application fails to execute you can try executing RoboRealm.exe while holding down the CTRL key. Holding down the CTRL key tells
RoboRealm NOT to try to connect to any cameras or run any existing configurations which allows RoboRealm to start in a safe default mode.
- If your webcam image does not appear in the main image area click on the Options Button->Video tab and select your camera in the dropdown selection. This should cause RoboRealm to start previewing the image in the main RoboRealm interface. Also be sure that the Camera button is pressed in order to activate the camera. If it is not, press the camera button and then use the Options button->Video tab to select the appropriate camera.
Hello World
Once RoboRealm is running and you have connected to and can see your webcam image you can now start inserting in modules that will affect the currently viewed image. You do this by using either the Contents, Index or Search tab in the upper left corner of the main interface. They all display the same modules but from a different perspective. Selecting a module and then pressing insert will insert that module into the processing pipeline. (You can also double click on a module to automatically insert it into the pipeline). Once a module is added into the pipeline it will start to alter the image in some way to extract or highlight certain features (color, shape, texture, etc.) By adding in more modules additional attributes can be filtered from the image more precisely in order to identify a particular object or image quality.
Note that you can also use Firewire Cameras, Internet Cameras, Video files (Media_Reader) or just static images (you can drag static images into RoboRealm) as apposed to using a webcam.
The processing of images using the inserted modules happens as quickly as possible and is limited by the speed of the camera in use and the CPU requirements of the inserted modules. The sequence of processing an image starts with an image capture (for example a webcam) and then proceeds by passing the image to each of the inserted modules one at a time in the sequence they appear in the processing pipeline. At the completion of all modules the resulting image is displayed (the exception to this is if a module is selected in which case the image up to and including that module is displayed to aid in debugging the pipeline). Once this image is displayed the processing loop begins again with the next new image. Note that if the camera does not provide a new image to RoboRealm then RoboRealm will STOP processing and wait for a new image as reprocessing an already processed image will not add any new information into the system. Thus the pipeline with no inserted modules will run at the frame rate of the webcamera. Adding a module will slow the looping speed a little depending on the processing requirements of the module. Different modules will have different CPU requirements as each module is different in terms of complexity and usage.
The pipeline will execute only when new information is provided. This includes a new image from a webcam or when a change is made to modules on a static image. Thus the frames per second will be limited by the rate of the attached camera.
To ensure that changes in the UI (User Interface) do not update while processing an image the UI will only update inbetween pipeline iterations. This means if you have a very slow pipeline the interface will not appear to update until the pipeline has completed. This can have the appearance of slowing down or freezing the application on slow executing pipelines.
You can also pay attention to the gray numbers on the right side of the pipeline. Those numbers indicate the number of milliseconds that each module takes. Those modules with high numbers are the cause of the pipeline slowdown. Often these modules are ones that are attempting to connect to external devices and have not yet established a connection. Other modules such as the Stereo module will require significant processing resources depending on the size of the image being processed.
The pipeline will iterate/execute twice. Once to process the image and a second time to create any annotations ontop of that processed data. This ensures that annotations written ontop of the image do NOT affect processing of successive modules. Because of this some modules may cause the annotations to not draw correctly.
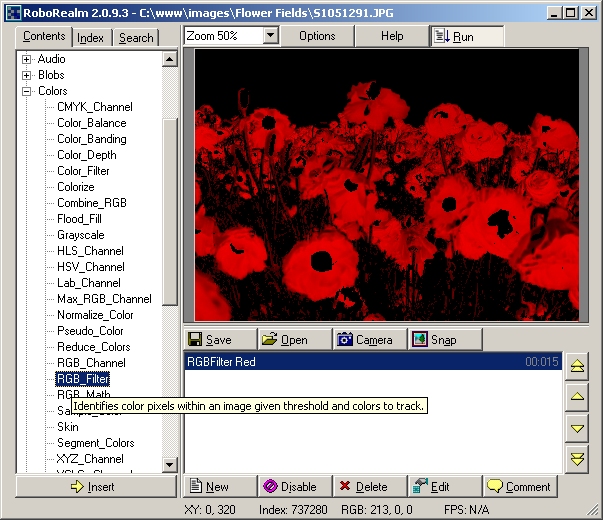
For example, adding in the RGB Filter module to the above image will cause the image to appear as
and then adding a Blob Size module to remove smaller connected objects would result in
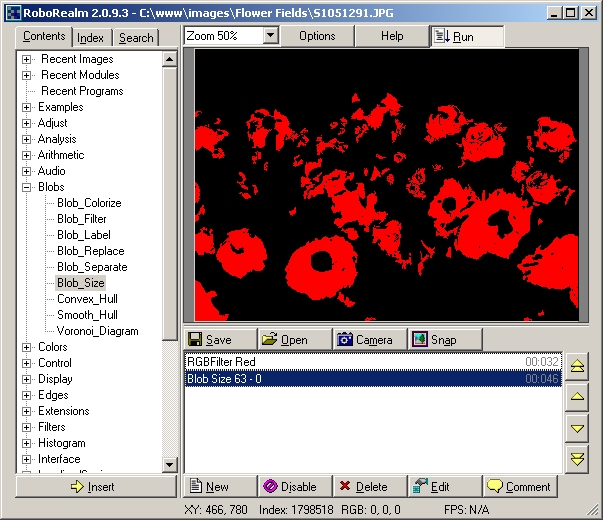
Note that the order of the modules is relevant. If the Blob_Size module is moved above the RGB_Filter module the resulting
image will not be correct as the initial image has thousands of colors that define individual pixels as apposed to connected blobs. You can
explore these configurations by clicking on the ![]() icon which will launch RoboRealm and allow you to change the configuration to see the effects.
icon which will launch RoboRealm and allow you to change the configuration to see the effects.
If you want to see the actual image without any modules changing the image untoggle the Run button in the upper right corner which will stop all modules from running and just show the image being captured from the imaging device.
You can continue exploring other robofile configurations by clicking on the "+Examples" branch in the Content tree view and double clicking on one of the example configurations. Ensure that you have a webcam on to see how the modules can change the image in realtime.
The Pipeline - Working with modules
Most modules have an associated user interface that will popup once inserted into the pipeline. Changing values in those interfaces will immediately be reflected in the processed image. You can experiment around with changing the values to view what changes do what to the current image. In this way you can better understand what change in a value causes what change in the image.
You can move the modules using the right side yellow move buttons. Note that most modules will react differently depending on where they are placed in the pipeline as the current image entering into that module will also be different.
Selecting a module will display the processing to that point in the pipeline. Using this technique you can understand what module is doing what to an image. Selecting the module again will deselect the module and show the entire processing of the pipeline.
You can zoom into the image by selecting the zoom dropdown at the top of the main interface. When zoomed in you can click on the current image and drag the image to move it to another area as you would Google maps.
The Save and Open buttons allow you to save and load processing pipelines also know as RoboFiles. The same buttons serve to load and save images. You indicate which data you want to load and save by specifying an extension i.e. .robo for robofiles and .gif, .jpg, etc. for images.
The Camera button switches the webcam on and off. The Snap button will save the current image being viewed into a second window that can be further zoomed in or saved. This provides you a way to quickly snap an image for a more in depth viewing in case the camera image is changing rapidly.

The New button removes all modules from within the pipeline and starts with a fresh empty configuration.
The Disable button will cause a specific module to be skipped for processing but remain in the pipeline. This is very useful if you are experimenting with several modules that create similar results but you are not sure which one to use and are comparing results. Disabling a module simply prevents it from changing or reacting to an image. Note that disabled modules are also saved as disabled in robofiles so be careful not to leave unintended modules disabled when saving.
The Delete button will remove the currently selected module from the processing pipeline.
The Edit button will cause a module's editable GUI to appear. This is the same action as double clicking on a module within the pipeline. Note that not all modules have an editable interface. For example the Negative module which inverts the current image does not have any parameters to edit and thus does not have an editable interface.
The Comment button allows you to associate a line of text with the currently selected module to aid in annotating the intended purpose of the module. Note that this can be used in conjunction with the Comment module which allows for longer annotations to be added into the pipeline.

Processing Pipeline
The processing pipeline displays all the modules currently active within RoboRealm. To view the original image without any processing unpress the Run button. When the Run button is activated the source image is captured, fed through each of the modules and then displayed. Once this has been accomplished the next image is captured and the process repeated. The processing pipeline can be thought of as filters within a infinite loop of capturing and processing frames. Note that as more and more modules are added this loop can slow down as shown by the FPS (Frames Per Second) rate in the interface status bar.
You can always see what the a module is doing to an image by selecting that module with the mouse (1 click) which will cause the pipeline to only how the processed image to the point of the selected module. If you want to see the original image you can press the Run button which will stop all processing of any module and show what the original image looks like.
Tabs
RoboRealm has tabs above the processing pipeline which add additional capability to the application in terms of creating and reviewing processing pipelines.
The Main tab is always the first tab in the list and is ALWAYS processed/called for each image. To create a second tab press the [new] tab which will create another tab. This new tab can be used to create a new processing pipeline. Note that while this tab is selected the first Main tab will still be executing. Each tab runs in a global context in that variables are shared across all tabs (i.e. if you set a variable in one tab, another tab will see that change).
Tabs other than the Main tab are executed when:
- You are currently in that tab (i.e. that tab is selected)
- You've set it to executing using the tab properties (white button on the right of the tabs).
- You are calling it from another tab using the Call module.
Images
During the processing of images several new images can be created and kept in memory using the Marker module. These saved images as well as other connected webcams can be accessed in certain modules (like the Marker) to restore the current image to previously saved images. In this way images can be moved into and out of the processing pipeline and saved for further processing. If you want to process more than one image at a time you can first process one image and then use the marker module to switch to another camera to process that image.
You can load in an image into RoboRealm in many ways. The most typically are using the Open button and specifying an image (or just dragging an image into the RoboRealm interface) or by pressing the Camera button and selecting an appropriate webcam. Other modules provide access to internet cameras, video files, etc.
Variables
As modules are added into the processing pipeline several RoboRealm variables are added into the variable table as needed. These variables are data units that are accessible from other modules and function as an information pipeline between modules or your custom scripts. See the Variables section of each module documentation page to see what variables are added by the module.
All variables currently within RoboRealm can be viewed using the Watch Variable module. Note that the placement of this module will reflect all variable values to that point. Thus the position of the Watch module may cause some variables to differ in values.
Several default variables are added once the pipeline begins execution.
| New Post |
| Getting_Started Related Forum Posts | Last post | Posts | Views |
| None |