

AVM Navigator
The AVM Navigator module is a third party module that provides object recognition functionality that allows you to program your robot to recognize objects in the environment. Using the AVM Navigator module you can change robot behavior based on recognized objects or navigate the robot relative to those objects.The AVM Navigator plugin is distributed outside of RoboRealm.To Install
1. Please download the zip file.
2. Extract the files in the c:\Program Files\RoboRealm\ folder. You will need admin permissions to do so. You may need to unzip to your desktop first and then copy the files to the RoboRealm folder.
3. Verify that the avm061.dll is in the RoboRealm folder and that the Navigator.dll and DVR_Server.dll is in the RoboRealm\Plugins folder.
4. Restart RoboRealm.
5. Look in the Plugins section in the Contents tab or type in Navigator in the Search tab. (Note, AVM is NOT the right name for the module).
The AVM Algorithm uses a principle of multilevel decomposition of recognition matrices, is steady against camera noise, scales well with additional objects and is simple and quick to train. It also performs well on higher image resolutions (960x720 and more). The algorithm works with grayscale images.
Detailed information about the AVM algorithm can be found here.
The AVM Module has several modes that instruct the module how to perform.
Object Recognition
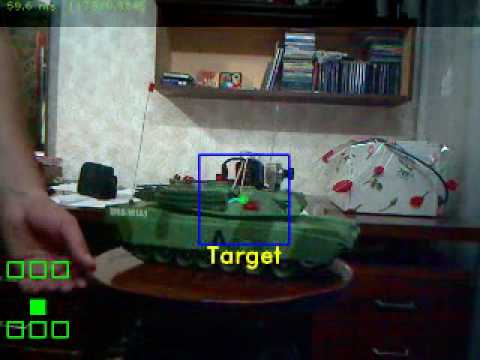
This mode allows you to train on a particular object as seen within the camera. Once trained the object will be identified when seen again.
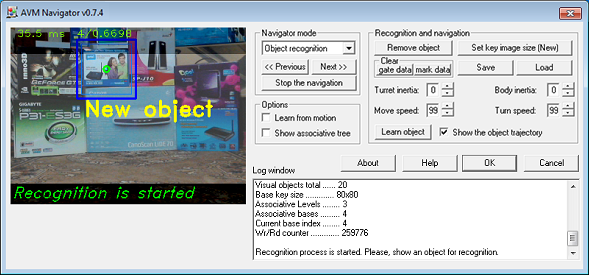
- Initialize AVM search tree by clicking of "Set key image size (New)" if it needed (this action clears all recognition data that were previously saved).
- Press "Learn object" button to learn a new object for recognition.
- You can hide an indication of object trajectory by disabling of "Show the object trajectory" option.
- If you want to remove some object data from AVM search tree then you should press "Remove object" button.
- All current data about learned objects, gates and marks is placed in the file "avm.dat". This file is located in user folder (for example: "C:\Documents and Settings\user\AVM\avm.dat"). You can save and load this data to/from another file by clicking "Save" and "Load" buttons and also you can remove data of objects, gates and marks selectively by clicking of "Set key image size (New)" that clear objects data, "Clear/gate data" or "Clear/mark data" buttons.
- You can set "Learn from motion" option for training on some movable object.
- Choose "Show associative tree" option if you want to see diagram of AVM search tree.
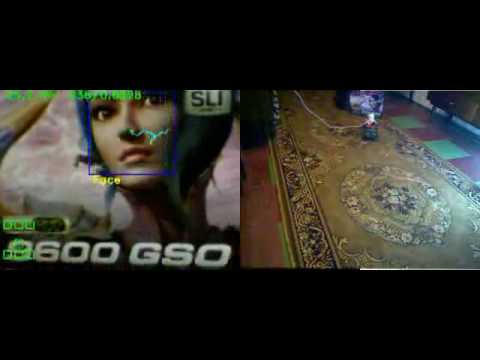
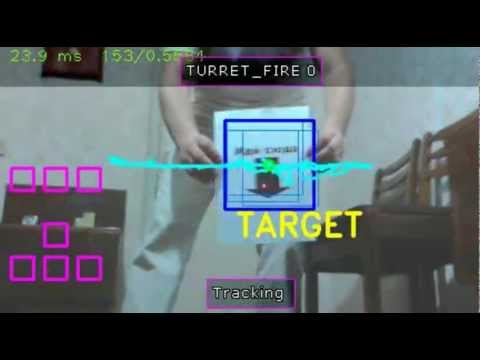
*How to make an object/face tracking
First clear the AVM search tree (if it needed) by click on button "Set key image size (New)" and further press "Yes".
Now you can train AVM on some faces like in video below:
When training will be done you should use variables that described below for your VBScript program:
NV_OBJECTS_TOTAL - total number of recognized objects
NV_ARR_OBJ_RECT_X - left-top corner X coordinate of recognized object
NV_ARR_OBJ_RECT_Y - left-top corner Y coordinate of recognized object
NV_ARR_OBJ_RECT_W - width of recognized object
NV_ARR_OBJ_RECT_H - height of recognized object
As example you can use these VBScript programs that was published in this topic.
*Speak an Object's Name
The variable NV_ARR_OBJ_IDX is an array and can be used to construct a string to speak using the following VBScript:
TotalObj = GetVariable("NV_OBJECTS_TOTAL")
ObjIdx = GetArrayVariable("NV_ARR_OBJ_IDX")

ReDim ObjName(20)
ObjName(0) = "1"
ObjName(1) = "2"
ObjName(2) = "3"
ObjName(3) = "4"
ObjName(4) = "5"

SpeakStr = "I see"

for i = 0 to TotalObj-1 step 1
SpeakStr = SpeakStr + " " + ObjName(ObjIdx(i))
next

if TotalObj = 0 then SpeakStr = SpeakStr + " nothing"

SetVariable "SPEAK_STR", SpeakStr
For the complete example ![]() download the robofile.
download the robofile.
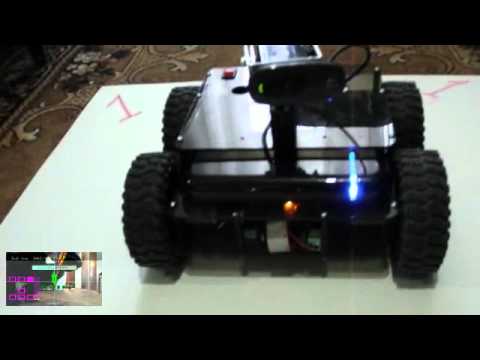
Navigate mode & Nova gate mode
Navigate mode - This mode is similar to the Object Recognition mode but it provides variables that specify which direction the object is in relation to the robot. Using these variables you can steer the robot towards a particular object. The algorithm attempts to align the position of a turret (with a camera fixed on top) and body of the robot to the center of the recognized object. If the object is far away it will alter the NV_FORWARD variable to signal a move forward. If it is too close the NV_BACKWARDS variable will be set to move the robot backwards. If multiple objects are recognized the object with the highest index (most recently learned object) is chosen.Also this mode provide a walking of robot from gate to gate by the route.
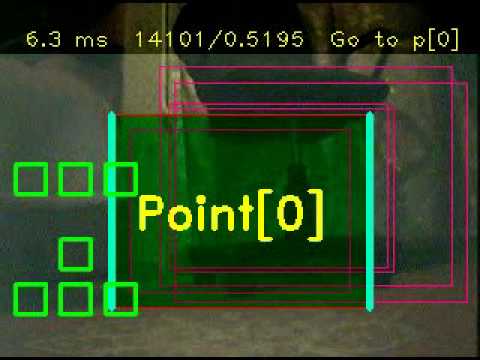
Walking to the point number - Activating of route that was selected by user for autonomous navigation and sets destination checkpoint.
Turret/Body inertia - Different robots require different timings based on their mass and size. Use the Inertia numbers to adjust the movement of your robot to compensate for different sizes.
Move/Turn speed - Definition of maximal speed for robot moving and turning. These parameters can limit the values of control variables.

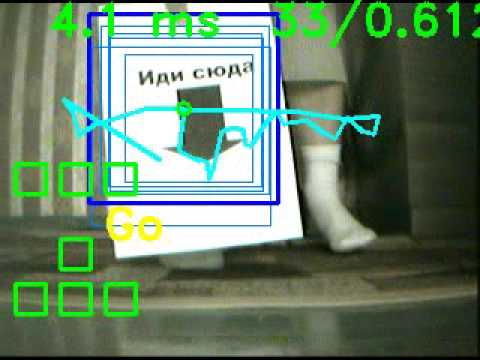
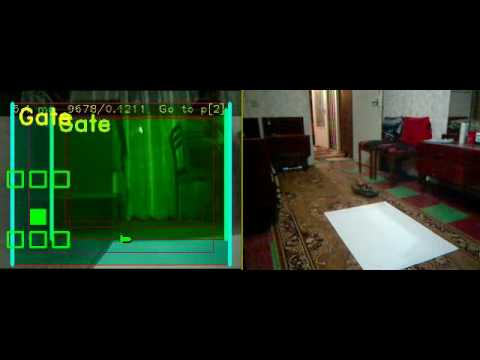
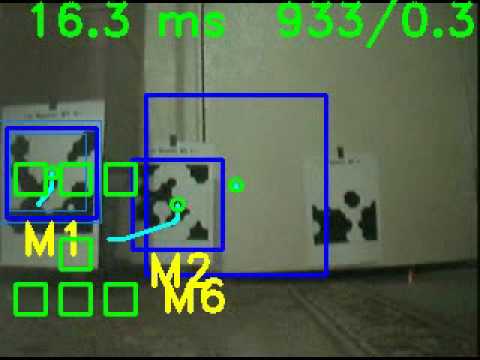
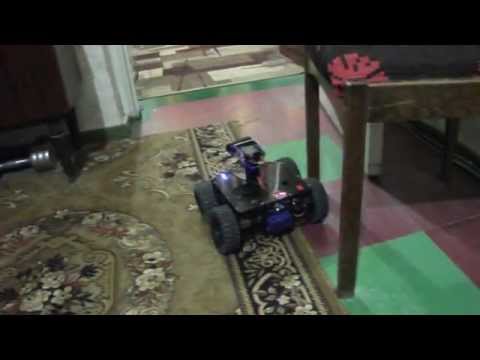
Nova gate mode - Similar to the Navigate mode this mode provides a visual stepping stone functionality by identifying 'gate' objects in succession. By sequentially identifying objects you can lead a robot along a path of visual markers.
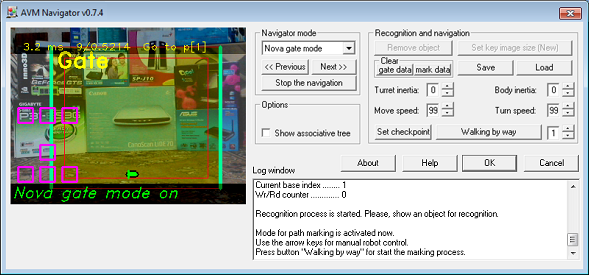
To train a route press the "Walking by way" button and then drive the robot manually through the route. The appropriate gates will be created automatically as the robot progresses through its route. When you reach the end of the route press the "Set Checkpoint" button which will cause the robot to turn on that spot and mark the spot as a checkpoint.
Once a route is complete, the robot can re-travel that route by identifying the same gates and use these gates to steer the robot along the correct path.
If the robot loses track of where it is along the route (i.e. no gates are in view) it will turn around on one spot to search for the next gate in the route sequence. As targeting gates may be momentarily lost from time to time this behavior may cause a slight twitching of the robot from time to time.
Historically first was developed "Navigate mode" and "Nova gate mode" that provided a walking of robot from gate to gate. The gate is an image (from robot camera) that associates with specific data inside AVM tree. The gate data contains weights for the seven routes that indicate the importance of this gateway for each route. At the bottom of the screen is an indicator "horizon" which shows the direction to adjust the robot's motion for further progress along the route. The gates are painted blue if the gates do not participate in the current route (weight rate 0) with warmer colors (up till yellow) show a gradation of "importance" of the gate in the current route.
These old modes were left within AVM Navigator just for compatibility with previous versions:
You should use more advanced navigation solution such as "Navigation by map" with "Marker mode" for route recording.
But you can use "Nova gate mode" for manual robot control with helping of arrow keys.
*How to get start
- Open RoboRealm dialog window.
- Make sure that "Camera" button is pressed in RoboRealm dialog window and also you should check out the camera resolution (it must be 320x240 pixels).
- Call the dialog window of AVM Navigator (click on it at video-processing pipeline) and then switch to "Nova gate mode". Now you can control your robot by arrow keys and also you can turn robot camera by "Delete" and "Page Down" keys ("End" key will set the camera in front position). If camera was turned you have to press "End" for alignment before continuing of robot moving.
Find out more here.
Also you can try to train with "AVM Quake 3 mod" for acquaintance with "Marker mode" and "Navigation by map" modes.
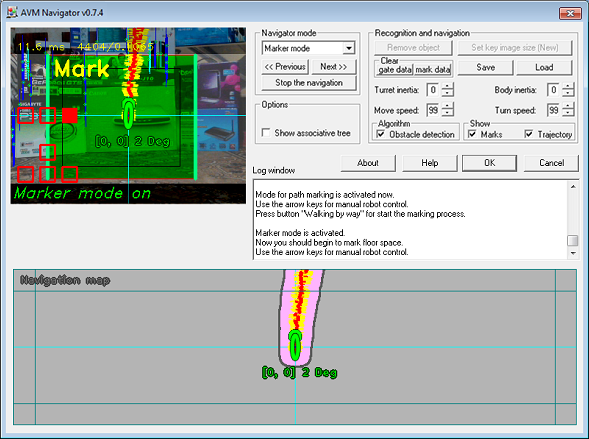
Marker mode
The marker mode provides for the creation of the navigation map that will done automatically by manually leading the robot along a path. For best results you should repeat the path several times in order to create appropriate map details.
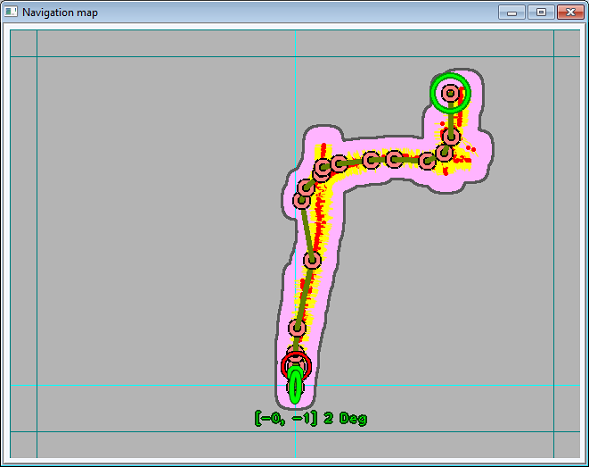
Navigation by map
In this mode you should first point the robot to the target position.
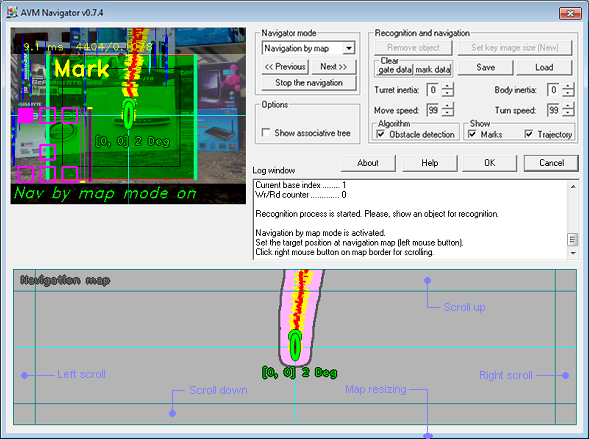
The robot then plans the path from the current location to the target position (big green circle) and then begins walking to the interim point of path (big red circle). When the interim point is achieved the robot gets the new direction to the next waypoint and so forth.

*How it works?
In our case the visual navigation for robot is just sequence of images with associated coordinates that was memorized inside AVM tree. The navigation map is presented at all as the set of data (such as X, Y coordinates and azimuth) that has associated with images inside AVM tree. We can imagine navigation map as array of pairs: [image -> X,Y and azimuth] because tree data structure needed only for fast image searching. The AVM algorithm can recognize image that was scaled and this image's scaling also is taking into consideration when actual location coordinates is calculating.
Let's call pair: [image -> X,Y and azimuth] as location association.
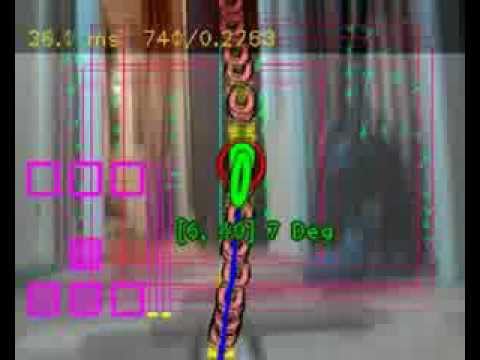
So, each of location association is indicated at navigation map of AVM Navigator dialog window as the yellow strip with a small red point in the middle. You also can see location association marks in camera view as thin red rectangles in the center of screen.
And so, when you point to target position in "Navigation by map" mode then navigator just builds route from current position to target point as chain of waypoints. Further the navigator chooses nearest waypoints and then starts moving to direction where point is placed. If the current robot direction does not correspond to direction to the actual waypoint then navigator tries to turn robot body to correct direction. When actual waypoint is achieved then navigator take direction to other nearest waypoint and so further until the target position will be achieved.
See here for more details.
First in video the robot has received command: "go to the checkpoint" and when robot arrived to the checkpoint then he was brought back to the start position of learned route. When robot noticed the changes then it indicated that robot was displaced because any commands were not given by robot to his motors however changes were seen in the input image. Then robot started looking around and localized his current position. Further the robot just calculated path from current position to the checkpoint and went there again.
Watching mode
The robot can move to direction where motion was noticed in this mode.

If robot see motion then he go to this direction but if further there is no motion then robot will come back to previous position.
*Obstacle avoidance
The robot processes the motion history of input images for the previous second. If any commands were given (i.e. the "forward" command) but no changes where seen in the input image (nothing happened) then the robot is assumed to be stuck (i.e. the robot is pushing against a wall). When stuck the module will set the movement variables to move backwards. The stuck situation is indicated by a red rectangle with a circle in the center.
*Odometry / localization
The robot sets the marks (it writes central part of the screen image with associated data to AVM tree). Marker data (inside AVM) contain horizon angle (azimuth), path length from start and X, Y location position (relative to the start position). Information for the marker data is based on marks tracking (horizontal shift for azimuth and change of mark scaling for path length measurement). Generalization of all recognized data of marks in input image gives actual value of azimuth and path length. If we have information about motion direction and value of path length from previous position and x, y coordinates of previous position then we can calculate the next coordinates of the current position. This information will be written to the new mark (inside AVM) when it is created and so forth.
The set of marks inside the AVM gives a map of locations (robot see the marks and recognize its location).
Examples


Quake 3 Mod
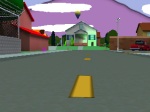 Don't have a robot just yet? Then click here to view the manual that explains how to setup RoboRealm with
the AVM module to control the movement and processing of images from the Quake first person
video game. This allows you to work with visual odometry techniques without needing a robot!
Don't have a robot just yet? Then click here to view the manual that explains how to setup RoboRealm with
the AVM module to control the movement and processing of images from the Quake first person
video game. This allows you to work with visual odometry techniques without needing a robot!
The additional software needed for this integration can be downloaded here.
Variables
The AVM Navigator module produces several variables that can be used to guide a robot.
       NV_FORWARD - set when the robot should move forward
     NV_BACKWARDS - set when the robot should move backwards
          NV_LEFT - set when the robot should move forward or backwards
                    to the left side
         NV_RIGHT - set when the robot should move forward or backwards
                    to the right side
  NV_TURRET_RIGHT - set when the robot should move the turret (with an
                    attached camera) to the right ("Delete" key in
                    Nova gate mode)
          NV_FIRE - reserved signal (however it can be activated if you
                    press the "End" key in Nova gate mode). If the "End"
                    key is pressed in "Marker mode" it will set
                    NV_TURRET_BALANCE to zero (turns the camera to face
                    the front).
   NV_TURRET_LEFT - set when the robot should move the turret to the left
                    side ("Page down" key in Nova gate mode)
NV_TURRET_BALANCE - indicates the turn degree amount. This value range
                    from -100 to 100 with forward being zero.

NV_OBJECTS_TOTAL  - total number of recognized objects
NV_ARR_OBJ_IDX    - index (identifier) of object
NV_ARR_OBJ_RECT_X - left-top corner X coordinate of recognized object
NV_ARR_OBJ_RECT_Y - left-top corner Y coordinate of recognized object
NV_ARR_OBJ_RECT_W - width of recognized object
NV_ARR_OBJ_RECT_H - height of recognized object
NV_ARR_OBJ_SIM    - similarity rate (0...1) of recognized object

NV_ARR_OBJ_CORNER - left-top corner coordinate of recognized object. This
                    variable contains both the x and y value. (X,Y)

NV_ARR_OBJ_RECT   - the rectangle coordinates of the recognized object
                    consisting of 8 numbers comma
                    seperated. (X1,Y1,X2,Y2,X3,Y3,X4,Y4).

 NV_IN_WAY_NUMBER - the curernt route number (from 1 to 7)
 NV_IN_SUBMIT_WAY - submitting of route number (value should be
                    set 0 -> 1 for action)
 NV_IN_CHECKPOINT - the current setting of checkpoint in Nova gate
                    mode. It also needs to set 0 -> 1 for action.

  NV_GATE_HORIZON - indication of gate horizone (float from -1 to 1) which
                    shows the direction to adjust the robot's
                    motion (0 - no adjustment)
NV_CHECKPOINT_NOW - indicates the checkpoint number when the robot arrives
                    at the end of the current route (1-7).
                    This variable is 0 if the checkpoint has not yet been
                    recognized.

    NV_LOCATION_X - current location X coordinate;
    NV_LOCATION_Y - current location Y coordinate;
NV_LOCATION_ANGLE - horizontal angle of robot in current location (in
                    radians).
  NV_IN_TRG_POS_X - target position X coordinate of the navigation map
  NV_IN_TRG_POS_Y - target position Y coordinate of the navigation map

 NV_IN_SUBMIT_POS - submitting of target position (value should be
                    set 0 -> 1 for action).

   NV_IN_SET_MODE - the current setting of module's mode:
                    0 - Object recognition
                    1 - Navigate mode
                    2 - Nova gate mode
                    3 - Marker mode
                    4 - Navigate by map
                    5 - Watching mode

    - Additional control variables (scaled to 255) -
   NV_L_MOTOR_128
   NV_R_MOTOR_128 - motors control
    NV_TURRET_128 - control of camera turning
NV_TURRET_INV_128 - inversed control of camera turning

 NV_DAT_FILE_NAME - data file name
  	 NV_LOAD_DATA - the non-zero value of this variable
                   	provides a signal for data loading
 		NV_REMOVE_IDX - the object index for removing. This variable provides removing of
                    recognition data from AVM with object index that was specified by the
                    user and further it will be switched to -1.
  	NV_WAYPOINT_X - current waypoint X coordinate;
  	NV_WAYPOINT_Y - current waypoint Y coordinate;
Recommended use of control variables
Use variable NV_TURRET_BALANCE for camera turning: NV_TURRET_BALANCE - indicates the turn degree amount. This value range from -100 to 100 with forward being zero. Use for motor control NV_L_MOTOR and NV_R_MOTOR variables that have range from -100 to 100 for motion control ("-100 " - full power backwards, "100" - full power forwards, "0" - motor off).
Note that the commands NV_LEFT and NV_RIGHT should be interpreted along with the commands NV_FORWARD and NV_BACKWARDS.
![]() Click Here to load a robofile that shows the object variables.
Click Here to load a robofile that shows the object variables.
![]() Click Here to load a robofile that shows the control variables.
Click Here to load a robofile that shows the control variables.
For more information
AVM Navigator Technical Overview
| New Post |
| AVM_Navigator Related Forum Posts | Last post | Posts | Views |
|
Navigation Plugin does not stay in .ROBO file
I have RoboRealm 2.79.12 with the AVM Navigator. It works fine when I add it to my .robo project, but when I save the... |
9 year | 3 | 3119 |
|
AVM Navigator
Hi Stephen. I have installed AVM navigator to a windows 8 64 bit computer. I have verified that all files are there and where th... |
9 year | 2 | 3182 |
|
AVM Navigator Marker Mode ini file missing
When starting the Marker Mode I get this error The application can't load initialization data from ... |
9 year | 2 | 3192 |
|
AVM Navigator
Hello, i wonder if AVM Navigator is no more being updated. This plugin would be the main reason for me to use RR... |
10 year | 3 | 3800 |
|
AVM_obj recognation issue
Hi Steven , I am using avm_navigator for recognize objects which flowing in... |
11 year | 2 | 3143 |
 Roborealm Crashes without reason
Hello Steven, I have some problems with my Roborealm, it always crashes after working some minutes. I logged detai... |
11 year | 5 | 3707 |
|
AVM navigator and APM 2.5
Hi, I have read through some posts and learnt that we can interface APM 2.5 with roborealm. I have few doubts: 11 year |
5 |
3532 |
|
|
Recently, I have update my RR with the latest version (2.72.10). I have try to run my AVM Navigator program on my RR but unfortu... |
11 year | 6 | 3617 |
|
AVM Modul
Help Need Yesterday I payed for AVM Module and I still have not got download link. Did anyone knows, how long I m... |
12 year | 2 | 3741 |
|
Hi, I programmed RR to loop a video file (avi) and AVM to track an object. I set the variable NV_WR... |
12 year | 14 | 4958 |
|
Clearing recognition data
Hi, I would be great if there was a feature to clear the recognition data of the avm.dat file inste... |
13 year | 2 | 3728 |
|
Tracking new object using AVM
Hi EDV, I programmed AVM to track a selected object. Now when that object is not in view i want to ... |
13 year | 2 | 3221 |
|
Training from an image
Hi, I was wondering if the AVM object recognition mode could be trained using still images instead ... |
13 year | 3 | 3970 |
|
input bounding box data to avm
Hi, Is it possible to send the bounding box data to avm using the vb script module so that the init... |
13 year | 5 | 3753 |
 AVM module failure
The video image in the AVM module is not display, but in roborealm yes, apparently, the module is working, it displays messages ... |
13 year | 4 | 3950 |
|
Stereo (stereoscopic) Vision object detection
I am fairly new to Roborealm so excuse me if I sound stupid. I have two webcams 2.5" (roughly the distance between my eyes) apa... |
13 year | 7 | 6269 |
|
Training the avm object recognition module with a list of images
Hi all, Can I train the AVM object recognition module on a series of images? I have a number of images of objects,... |
13 year | 8 | 4352 |