Sample Line Points
The Sample Line Points module will detect one or more lines within the current image and create an array of points along that line. This module can be used to generate an array of points to be used by other modules or saved for further processing. The included example shows how to generate a list of points from a laser scan of a 3D object.
Interface

Instructions
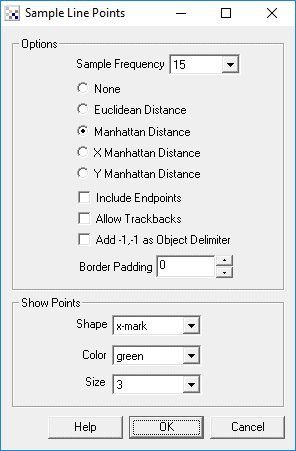
1. Sample Frequency - Specify the sampling frequency. The frequency is the spacing between point samples. A smaller frequency will create many more tightly packed points than a larger frequency.
2. Select the sample technique.
- None - no sampling is done. Useful when just the endpoints are desired
- Euclidean - if the frequency is x then every point x pixels from the last one is sampled using the Euclidean sqrt((x*x)+(y*y)) distance formula.
- Manhattan - if the frequency is x then every point x vertical or horizontal pixels from the last one is sampled.
- X Manhattan - only the horizontal pixel distance is checked against the frequency. This will produce points that are multiples of the frequency on the X axis but not on the Y.
- Y Manhattan - only the vertical pixel distance is checked against the frequency. This will produce points that are multiples of the frequency on the Y axis but not on the X.
3. Include Endpoints - select if you wish to include the line endpoints in the final point array. Including endpoints will ignore the sample frequency settings to ensure that the endpoints are included.
4. Allow Trackbacks - often lines will track back on themselves (think of a line with 3 endpoints). Selecting "Allow Trackbacks" will include the trackback points that were traversed to get to the next endpoint regardless of if the values have already been included in the array.
5. Add -1,-1 as Object Delimiter - if you have more than one object in the current image a -1,-1 will be added into the sample line array to indicate that a new object is about to be specified. If you are just using the points in other modules you may want this unchecked to remove the -1,-1 coordinates from being specified in the SAMPLE_LINE_POINTS array.
6. Border Padding - Specify the border amount that will NOT be included in the sample line points. This can be used to prevent sampling along image borders.
7. Color - to see what points are being sampled you can select the color of the marker that indicates a point has been sampled.
8. Shape - the shape of the marker that indicates a point has been sampled.
9. Size - the size of the marker
Example
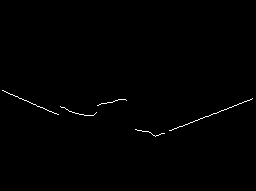
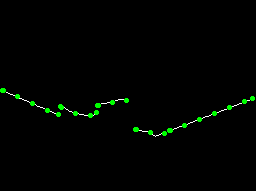
| Source | Sample Line |
 |  |
![]() Click here
to load a robofile configuration that will generate the above image. The included
image shows a laser scan of a 3D object and how the scan is processed to refine
the edge in order to be sampled correctly.
Click here
to load a robofile configuration that will generate the above image. The included
image shows a laser scan of a 3D object and how the scan is processed to refine
the edge in order to be sampled correctly.
Variables
SAMPLE_LINE_POINTS - the array that is created based on the points being
sampled. The array format is x,y (2 numbers) that indicate the points x
and y coordinates. Note that the end of a line is marked with a double -1,-1.
This indicates that one line has completed and another is about to start and
depends on the -1,-1 checkbox (see above) if
this will occur.
See Also
Sample Curve
Point Location
For more information
Wikipedia - Manhattan Distance
| New Post |
| Sample_Line Related Forum Posts | Last post | Posts | Views |
|
Hi Steven I am trying to build my own CNC. For that I want to run a loop on array of coordinates of bright pixels.... |
8 year | 3 | 2894 |

Any idea how to convert into series of x,y coordinates of: 1. Blue curve 2. Upper and... |
9 year | 2 | 3048 |
