
Orient Image
The orient image module will align an arbitrary image with respect to major gradient direction of the image. Basically this means that if an image has a lot of straight lines in one direction the entire image will be reoriented such that those lines are vertically straight. This is functionally similar to the Visual Anchor module but will align an image based on just the image's content as apposed to with respect to another image such as in the Visual Anchor.This is useful when image that you are working with need to be aligned to a canonical view (i.e. any image containing the same content needs to be aligned to a known orientation). For example, images of barcodes, playing cards, text, room scenes, etc. all exhibit enough straight lines for this module to work. Once these image have been aligned further processing is typically done to extract out other features or as precursor to modules such as barcode recognition, OCR, template matching, etc.
Straight lines are great to use for aligning images but do have a 180 degree ambiguity. Thus this module will tend to align images in either vertical direction and may flip the image even on very similar content. Thus you will need to allow for two final orientations for each image.
Note that by canonical orientation we mean an orientation that each image with the same content will end up in. This angle is not specified by you but determined intrinsically by the image contents. The actual angle it ends up in is not important, the fact that whenever the same image appears it is rotated to the *same* orientation is important.
Also note that this module looks for white pixels as being foreground and black pixels as being background. If you need you can add the Negative module to invert an image.
Interface
Instructions
1. Inserting the module will produce images aligned to their intrinsic orientation. Keep in mind that the orientation of the image is based on the image content. Not all images will have a stable alignment.
2. Method - There are many ways to determine an objects orientation. As no one method covers all cases well select an appropriate method for your image. Keep in mind that each method will chose a different final orientation for your image. This is normal. What you are looking for is that all images you test result to the same orientation whatever that might be. If you know that each image is oriented in the same way after this module you are use the Rotate module to rotate the image to a desired rotation.
- Gradient - This technique will look at a full color image and determine its canonical orientation based on the gradient (surface slope). This works best for images with lots of texture.
- B&W Outline Angle - This technique will threshold the image into a black and white object and then investigate the curvature of the outline of the resulting blobs in order to determine the canonical orientation. This is a good general technique but also suffers from a 180 degree ambiguity (i.e. the image may be rotated to 0 or 180 degrees at random) unless the objects shape is asymmetrical.
- Angular Moment - This uses the second order Moment of Inertia technique to determine the orientation.To see more about moments have a look at the Moment Statistics module.
- B&W COG COP Angle - This technique determines the objects COG (center of gravity) and its COP (center of perimeter points) and uses the angle between them to determine the canonical orientation. This works best for objects that have holes in them.
- B&W Max COG Angle - This technique determines the objects COG (center of gravity) and the point along the perimeter furthest from the COG. The angle between these two points is what determines the objects canonical orientation.
3. Centering - To center the image select an appropriate technique. "Center using pixels" will calculate the Center of Gravity of pixel values (i.e. white is high relevance whilst black is very low). This will cause an image with a white object to center in the middle of the image. Use "Center using edge values" to center an object based on the edges of an object. This will center an object based on what parts of the object have more texture or more edges.
4. Size - As an objects size can change in addition to its orientation the size percent can be used to create a canonical object size. If non-zero this field specifies the size to scale the image relative to this canonical size as the canonical size can sometimes be larger than the current image size and the need to shrink the object slightly is needed. Thus using the size parameter at 100% will show all the same objects with the same size.
5. Rotation - Some objects will be asymmetric and always rotate to exactly the same orientation regardless of their initial orientation. But some images (like a square) are not asymmetric and may appear in 0,90,180,270 degree orientations. If you have an object that appears to flip orientation randomly try to reduce the allowed rotation amount to a reduced degree. This will stabilize the final rotation based on the initial orientation of the object. For example, if you have a square object and know that for the most part the object always appears +=45 degrees in the desired orientation restricting the rotation from 0 to 90 will ensure that the final object rotation will be biased towards the initial rotation. Naturally, if your square object does not appear in about the right orientation then you will have to accept a 90 degree ambiguity.
6. Image Source - Select which image should the final transformation be performed on. As the current image might be pre-processed before entering into this module you can also specify "Source" in the dropdown which will transform the original image to its canonical rotation and size.
Example
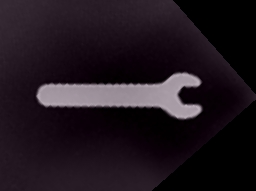
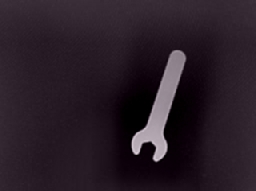
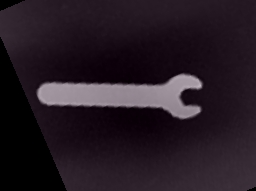
| Source | Oriented Image |
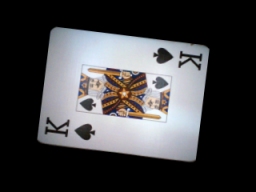 | 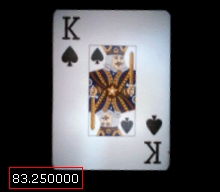 |
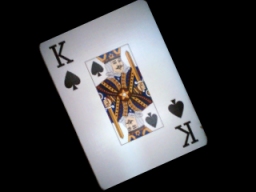 | 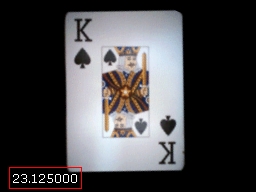 |
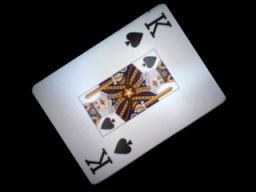 | 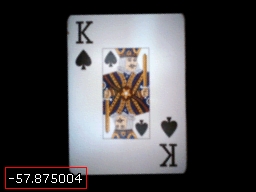 |
For symmetrical objects that can be easily thresholded the B&W COG COP Angle performs better.
| Source | Oriented Image |
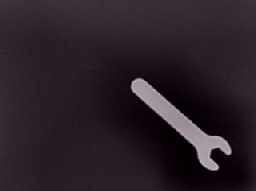 |  |
 | 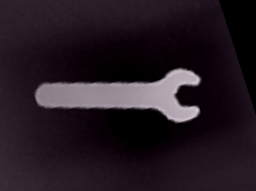 |
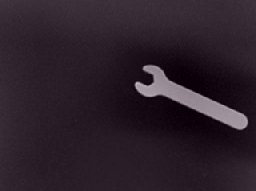 |  |
Variables
ORIENT_IMAGE_ROTATION - specifies what degree of rotation was
  applied to the image in degrees.
ORIENT_IMAGE_X_TRANSLATION - if centering is enabled this
  variable contains the horizontal translation in pixels
  of the image needed to center it.
ORIENT_IMAGE_Y_TRANSLATION - if centering is enabled this
  variable contains the vertical translation in pixels
  of the image needed to center it.
See Also
Visual Anchor
Rotate
| New Post |
| Orient_Image Related Forum Posts | Last post | Posts | Views |

I'm trying to make a setup that will recognise the orientation of a sticker that has two identical barcodes on it. Is there a wa... |
10 year | 5 | 3455 |

This project is concerned with measuring the angle that a white tag lies in an image. An example of what the image will look lik... |
17 year | 3 | 5351 |

Hello Steven, [image1] [image2] I’m trying to align/regi... |
17 year | 9 | 5651 |