
Label Object
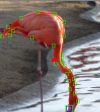
The Label Object interface provides a way to outline an object of interest such that the system can use that labeling to distinguish what is desired to be recognized versus what is not. There are a couple ways to accomplish this but the idea is identify areas of the image using lines connected by points.This can be used in conjunction with the new Train feature in many modules that allows genetic auto-tuning capabilities. Simply specify the object to be detected with this Label feature and the module will auto-tune the parameters as best it can to achieve the desired results. As this feature becomes included in more and more modules, you will be able to create AI assisted vision solutions that are fully explainable without the AI Deep Learning / Neural Network black box issues.
The toolbar provides multiple ways to outline the object. You can also use key combinations to enter certain labeling modes which can be more convenient than pressing buttons.
Interface
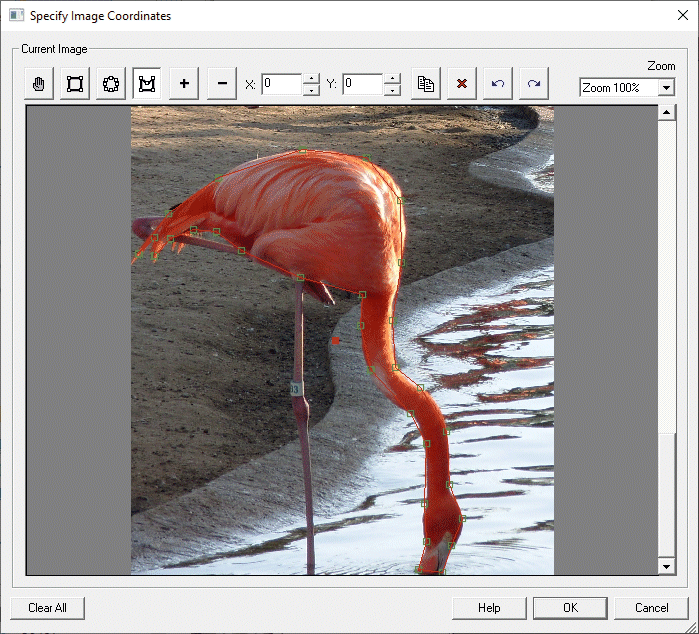
Instructions
Drag the image to move to the appropriate location of the object to label. You can also use the mouse wheel to zoom in and out of the image.
![]() Select Square - The select square tool provides a way to drag a label
as a rectangle. Once this mode is active, click on the image and while holding the mouse button drag the rectangle to
cover the area of interest. Once released the individual points can be moved using the mouse. This can also be accomplished
by holding down the SHIFT key and dragging the mouse to create a new label.
Select Square - The select square tool provides a way to drag a label
as a rectangle. Once this mode is active, click on the image and while holding the mouse button drag the rectangle to
cover the area of interest. Once released the individual points can be moved using the mouse. This can also be accomplished
by holding down the SHIFT key and dragging the mouse to create a new label.
![]() Select Circle - Provides a way to select a circular area of the image.
Click on the image and drag to create a circle to encompass the area of interest. Once released the individual points
can be moved using the mouse. This can also be accomplished
by holding down the ALT + SHIFT key and dragging the mouse to create a new label.
Select Circle - Provides a way to select a circular area of the image.
Click on the image and drag to create a circle to encompass the area of interest. Once released the individual points
can be moved using the mouse. This can also be accomplished
by holding down the ALT + SHIFT key and dragging the mouse to create a new label.
![]() Select Poly - Provides a way to specify an area by successively
clicking on the boundary of the object to connect line segments along a changing border that would not be well
represented by a rectangle or circle. Note this mode differs in that you do not drag the mouse to each point
but click on the image each time a new segment should be added. You can fine tune the existing points
by clicking on the green squares to move each individual point. This can also be accomplished
by holding down the ALT key while clicking the mouse to create connected line segments.
Select Poly - Provides a way to specify an area by successively
clicking on the boundary of the object to connect line segments along a changing border that would not be well
represented by a rectangle or circle. Note this mode differs in that you do not drag the mouse to each point
but click on the image each time a new segment should be added. You can fine tune the existing points
by clicking on the green squares to move each individual point. This can also be accomplished
by holding down the ALT key while clicking the mouse to create connected line segments.
![]() Add Point - When pressed this tool will insert a new point
at the current mouse location. This allows you to change the shape of any existing label by adding new points
into the label. This can also be accomplished by holding the CTRL key while mouse clicking.
Add Point - When pressed this tool will insert a new point
at the current mouse location. This allows you to change the shape of any existing label by adding new points
into the label. This can also be accomplished by holding the CTRL key while mouse clicking.
![]() Delete Point - When pressed this tool will remove any existing
point that you click on from an existing label. This can also be accomplished by pressing the DEL key when focused on a
particular point.
Delete Point - When pressed this tool will remove any existing
point that you click on from an existing label. This can also be accomplished by pressing the DEL key when focused on a
particular point.
![]() Delete Label - When pressed this tool will remove the current label
and all its points.
Delete Label - When pressed this tool will remove the current label
and all its points.
![]() Undo - Undoes any action like adding or deleting points. This can also be
accomplished using the CTRL-Z key combination.
Undo - Undoes any action like adding or deleting points. This can also be
accomplished using the CTRL-Z key combination.
![]() Redo - Redoes any action like adding or deleting points. This can also be
accomplished using the CTRL-Y key combination.
Redo - Redoes any action like adding or deleting points. This can also be
accomplished using the CTRL-Y key combination.
![]() Green Point - Click and drag to move point. Click and press DEL or click on
delete tool to remove the point.
Green Point - Click and drag to move point. Click and press DEL or click on
delete tool to remove the point.
![]() Center Point - Click and drag to move entire label.
Center Point - Click and drag to move entire label.
Clear All Button - Removes all labels from the current image.
See Also
Auto Threshold
Adaptive Threshold
Color Filter
Color Threshold
Population Threshold
RGB Filter
RGB Math
| New Post |
| Label_Object Related Forum Posts | Last post | Posts | Views |
| None |