
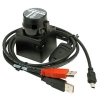
Hokuyo URG Laser Scanner
The Hokuyo URG module provides an interface to the URG laser scanner. This small, compact and speedy scanner is ideal for robots that need obstacle avoidance or navigation using a laser scanner. The scanner is capable of 100 ms scans (10 fps) and can detect objects up to distances of several meters. With a USB connection to a PC this is an ideal scanner to use on your Robot with RoboRealm. You can purchase one of these great scanners from stores like RoadNarrows.Note that the graphic seen in the interface is also saved as an image in memory with the name HOKUYO_URG_GRAPHIC and can be accessed using the Marker, Display Image, etc. modules.
Interface
Instructions
1. COM Port - select the appropriate COM port that the laser uses. Note that 115K baud will be used for the communication speed.
2. Remember As Default - Select the "Remember as Default" checkbox if you would like the current COM setting to be remembered by RoboRealm such that whenever the URG module is loaded the com port will be auto-selected. This ability allows you to not have to constantly change the COM port when loading in successive RoboRealm configurations.
3. Motor Speed - if you are using more than one laser at a time you may wish to select a different motor speed for each of the devices. This helps to isolate any interference between the devices.
4. High Sensitivity - Select if you want to turn on high sensitivity. High sensitivity will increase the lasers detection ability by about 20%. However there may be chances of measurement errors due to strong reflective objects near 22m.
5. High Range - By default the laser produces 12 bit values. If you need greater range select the checkbox and the laser will return 18 bit range values.
6. Filter Smooth - If you notice a bit of errors within the range information try smoothing out the values by increasing the Smooth value. This will average out each signal with its neighbors to provide smoother values.
7. Display Zoom - Select how much zoom to apply to the current view. Auto will detect the furthest object and scale the display accordingly.
8. Display Fill - Check if you want the graphic to be filled with the specified color.
9. Display Chart Type - Select how you want the values to be displayed.
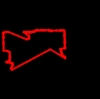 Radial - Displays the range points connected as you would expect them to be seen in reality. Note that
areas perpendicular to the sensor are connected despite no actual values being present. (i.e. changes in
depth are connected between values).
Radial - Displays the range points connected as you would expect them to be seen in reality. Note that
areas perpendicular to the sensor are connected despite no actual values being present. (i.e. changes in
depth are connected between values).
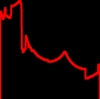 Cartesian - Displays the range values in a traditional XY chart.
 Intensity - Displays the range values as a single row with intensity values based on actual range. Brighter
objects are closer.
Intensity - Displays the range values as a single row with intensity values based on actual range. Brighter
objects are closer.
 Points - Displays the raw points as received from the laser scanner.
10. Display Color - Select the color you want the graphic display to use.
11. Graphic Size - Select the line, or point size that should be used when displaying the graphic.
12. Average Statistic - Select if you want a variable to be created that indicates the average of all the range data.
13. Maximum Statistics - Select if you want a variable to be created that indicates the maximum distance within the range data.
14. Minimum Statistics - Select if you want a variable to be created that indicates the minimum distance within the range data.
Variables
HOKUYO_URG_AVERAGE_VALUE - average value of all range data
HOKUYO_URG_AVERAGE_ANGLE - average angle of all range data
HOKUYO_URG_MINIMUM_VALUE - the minimum value detected in all the range data
HOKUYO_URG_MINIMUM_ANGLE - the angle towards the minimum detected value
HOKUYO_URG_MAXIMUM_VALUE - the maximum value detected in all the range data
HOKUYO_URG_MAXIMUM_ANGLE - the angle towards the maximum detected value
Markers
Hokuyo_URG_Graphic - graphic shown in GUI
See Also
RoboPeak RPLidar
Laser Line
For more information
RoadNarrow's Hokuyo Webpage
| New Post |
| Hokuyo_URG Related Forum Posts | Last post | Posts | Views |
|
I bought a URG-04LX laser scanner and I am trying to interface it to RoboRealm module. I have a problem: | 15 year | 1 | 5010 |
|
HOKUYO_URG EXAMPLE
I am trying the URG hokuyo example with my model UTM30LX. Everything seems to go nice except the visualization. The laser connec... |
16 year | 3 | 5090 |