

Align Image
The Align Image module provides a way to align two images. Similar to the Visual Anchor and Stabilize module the Align_Image module will look for characteristic properties between two images in an effort to determine how they overlap.Note that if too much of the target image is not included in the image to align then the system will produce erratic results as any detected alignment between the two images will be random.
This module will determine the translation (X,Y) movement, the Z plane rotation or orientation and the scale changes between the two images. Note that in order to associate the placement of one image over the next you will need some texture within the image that is the same in both in order to determine how to overlay the image.
The module was developed to allow for comparison between two images that may be somewhat misaligned such as in a security setting to determine abandoned or removed objects. It is also very useful in document comparison such as comparing differences between scanned or otherwise photographed documents. Both automated and manual modes of alignment are supported.
Interface
Instructions
1. Target Image - Select the "Target Image" in the Image Source dropdown. The target image is your model image that typically does not change. The source image will be stretched, rotated, etc. in order to make it as close as possible to the Target Image.
2. Align Image - Select the image you want to align to another image. Typically this will be the current video image from your webcam or come from a loaded image (see Load Module) for image loading.
3. Display - Select how you want the two images to be displayed relative to each other. As there are many ways to do this to highlight specific aspects of each image, you can select which method should be used.
-
Aligned - Shows the Source image aligned to look like the target image.
Target - The target image to align to (i.e. a good template).
Source - The source image to align (i.e. an image rotated, skewed, etc. that is to be aligned to the target).
Flicker - Causes the two images to flicker back and forth between each other. This helps the eye to understand the movement between the two images and can help to determine alignment or rotational issues. No glasses are required for this mode.
Side by Side - Produces a single image with both images displayed side by side.
Edges - Shows the detected edges of each image. This can be useful for manual tuning as Blue and Green edges from the two images becomes yellow when aligned correctly.
Transparency - Shows the two images averaged over each other like a transparency. Also used for manual alignment.
Red Green - Target image is represented by the red channel, while the Source image is represented by the Green channel. When the intensities are the same yellow will appear. This is similar to the Edges mode but instead shows the image intensities instead of their edges.
Difference - Target image and Aligned Source image are subtracted from each other to show the differences between the two.
Wide Difference - Target image and Aligned Source image are subtracted from each other to show the differences but with a wider search area. A wide difference will cause each pixel to check its immediate neighborhood for a good match and then use that as the difference amount rather than an exact match. For example if you have a source pixel value of 156 and the corresponding target image's pixel is 14 but inside
200  66  44
156 (14)  0
40    0   0
instead of producing the result 156 - 14 = 142 the module will instead look around the 14 value pixel for a better match and instead use 156 - 156 = 0. Thus if the alignment is still off by about a pixel that would not matter much.
Target Difference - The Difference mode performs a subtraction between the two images and then negates any negative values back to positive to ensure that regardless of values a difference is show. The Target difference will subtract the target from the aligned source but zero out any negative values. Values below the selected Threshold will also be set to zero.
Source Difference - Functionally the same as Target Difference except that the aligned Source image is subtracted from the target image with any negative values being set to zero. Values below the selected Threshold will also be set to zero.
Red Blue - Target image is represented by the red channel, while the Source image is represented by the Blue channel. When the intensities are the same purple will appear.
Red Blue - Target image is represented by the red channel, while the Source image is represented by the Blue channel. When the intensities are the same purple will appear.
Purple Green - Target image is represented by the purple channel, while the Source image is represented by the Green channel. When the intensities are the same gray will appear otherwise the differences will appear in color.
Green Red - The inverse of the Red Green mode. (Target = Green, Aligned Source = Red, Aligned = Yellow)
Blue Red - The inverse of the Red Blue mode. (Target = Blue, Aligned Source = Red, Aligned = Purple)
Green Purple - The inverse of the Purple Green mode . (Target = Green, Aligned Source = Purple, Aligned = Gray)
4. Perspective - While Rotating in the X and Y plane (spin and flip) you can specify the amount of perspective to incorporate into the transform. The amount of perspective will change how much the image shrinks at points far away in depth and how much the image enlarges when closer in depth. A high perspective number causes things to seem very fat while a smaller number will cause more and more warping of the image at higher X or Y rotations. The amount of Perspective loosely correlates with the amount of warping seen in the image which is interpreted as depth by us.
5. Performance Pixel, Bilinear Resample - Select how precise the Source image should be transformed into the Target image. Pixel Resample refers to a nearest neighbor approach where a pixel from the Source image is transformed and placed into the nearest pixel of the transformed image. This creates a jagged effect but provides a quicker transform process. The Bilinear will interpolate the pixels position and smooth out the final image to avoid jaggies and create a more natural final transform but at the expense of reduced performance.
6. Options - Select which mode you would like to use for image Alignment. The Automatic mode seeks to find the correlation between the two images without needing any feedback from you. There are cases that may occur when you will need to adjust the values manually. In those cases you can select the Manual radio button which will enable all the value editing interfaces in the Manual Values section.
In automatic mode the "Text & Line Images" selection will work better with images that are mainly black and white and contain lines, drawings. The "Color Images" works better on images that are of real scenes and contain texture/gradients within the image.
Note that in order for the automatic mode to work correctly the majority of the image content needs to be shared between the two images.
7. Manual X, Y Translation - These are the values associated with the horizontal and vertical movement of the Source image to align it with the Target image. Modifying this value will move the Source image in relation to the Target image in efforts to align them better. Note that these values are in pixels.
8. Manual X,Y Scale - These are the values associated with the size change from the Source to the Target image. For example, an X or Y scale of 2 means that the Source image is enlarged to twice its size in order to align with the target image. Similarly, a value of 0.5 means the Source is reduced to half its size in order to align with the target image. One can interpret this as meaning how close or far are you from the Target image in terms of depth.
Typically images scale in the same amount for X and Y. But sometimes due to a non- perpendicular photographic plane this may not be true. If you select the Automatic mode or press the Refine button both X and Y will be optimized separately just in case. While manually editing you may find it easier for them to have the same value which can be enforce by checking the "Scale X&Y together".
9. Manual X, Y Rotation - These are known as 'out of plane' rotation in that they will spin and flip the image (X and Y Rotation) such that the image appears to exist into and out of the computer screen (ie. the Z Plane). Note that the automatic mode does NOT currently change these values.
10. Manual Z Rotation - This is also known as orientation and fixes situations where the Source and Target image are upside down with respect to each other. This parameter will twist the Source image until it better aligns with the Target image. If you are more comfortable in working with Radians as apposed to degrees you can select the Radian radio button to switch between Degrees and Radians.
11. Manual Refine - The refine button will execute an automated alignment just once on the image. This is helpful when using the manual mode of image alignment such that when you get things close you can try the Refine button in order to tweak the final values. Note that the alignment should be close in order for the Refine button to work. If the images are far apart in terms of alignment then the Refine button may not find a match or make things even worse.
12. Local Refinement - Currently disabled but will be used to refine alignment locally (as apposed to globally) where the image is divided into smaller sections and aligned further. This help to align local issues such as skewed or crumpled images. If you have such requirements please contact us about this functionality.
13. Automatic Alignment Limits - Limits the range that the automatic method will allow when testing alignments. This ensures for really bad alignments that the produced values are still within a known range and don't cause the aligned image to disappear from the result completely. Limiting the allowed transform ranges will ensure that bad matches will show bad results as apposed to no results at all. Note that the Translation is specified as a percentage of the source image. A value of 50% means that the system can allow a translation of 1/2 the size of the image in order to find a best match. Likewise, if you know that images will never be up-side-down with respect to each other you can probably reduce the Rotation to 45deg which will speed up alignment.
Example
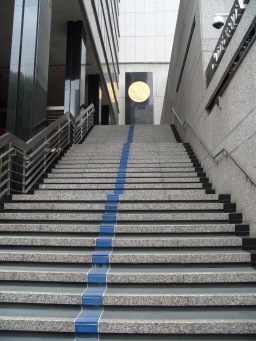
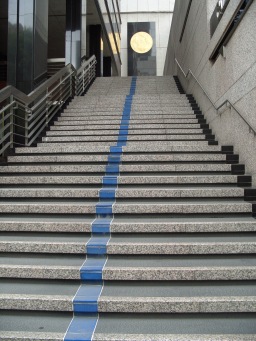
| Source | Target |
 |  |
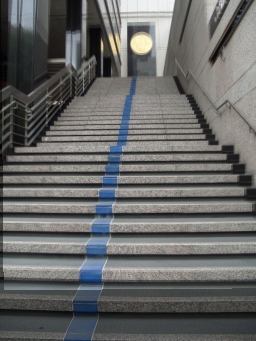
| Aligned Image | |
 |
Download the zip file containing the above two images and the robofile used to generate the aligned image.
| Source | Target |
 |  |
| Aligned Image | |
 |
Download the zip file containing the above two images and the robofile used to generate the aligned image.
Variables
ALIGN_X - the X translation that aligns the image to the target.
ALIGN_Y - the Y translation that aligns the image to the target.
ALIGN_X_ROTATION - the X or spin angle that aligns the image to the
  target (degrees)
ALIGN_Y_ROTATION - the Y or flip angle that aligns the image to the
  target (degrees)
ALIGN_Z_ROTATION - the Z or rotation angle that aligns the image to the
  target (degrees)
ALIGN_X_SCALE - the X or width scale factor that relates the image to
  the target
ALIGN_Y_SCALE - the Y or height scale factor that relates the image to
  the target
ALIGN_CONFIDENCE - a percent confidence of how well the Source image
  matches the Target image after transformation. 100% is very
  confident, 0% is not.
See Also
Visual Anchor
Stabilize
| New Post |
| Align_Image Related Forum Posts | Last post | Posts | Views |
 Comparing Folder images
Hello, I am trying to compare all the images in one Folder against all the images in another folder. The images are all named th... |
9 year | 8 | 3614 |
|
Tabs
Hi STeve - How can I change the active tab from VB.net?... |
10 year | 4 | 3555 |

Steven, I thought Image Matching was going to work for me - but it does not. I was tryin... |
10 year | 2 | 3607 |
 Best shape to detect upper-left corner of a table
Need to find X,Y coordinates of upper-left corner of each table in [Temporary 2.jpg]. I use Object_Recognition module -> Shap... |
11 year | 6 | 3706 |
|
Image overlap
Hi STven, I want to do cross browser testing with RoboRealm. [Problem]- I want to open web page in M... |
12 year | 2 | 3632 |
 Detecting feature
Hi All I'm trying to figure out how to recognise a feature, by doing an image comparison, if thats... |
13 year | 3 | 3788 |
 Training object background
Hello I found this sentence in documentation: "Note, it is always best just to include the object to be identifie... |
14 year | 6 | 4720 |