
Perspective Correction
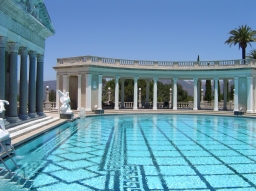
The Perspective Correction module provides an image transform that corrects for the effects of perspective. Perspective is created whenever a scene has depth and will distort objects to appear larger the closer they are to the camera source and smaller when further away. The Perspective Correction module can undistort some of the perspective effects to provide a more calibrated view for successive processing.The effects of perspective can be readily seen when viewing a grid like surface stretching out into the distance. Measuring the pixel size of any of the square boxes will reveal that they shrink with distance. This can cause problems when attempting to map out obstacles in from of the robot as their sizes cannot be easily determined unless perspective is taken into account.
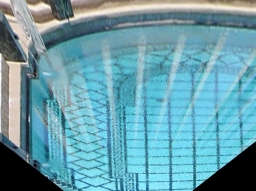
The Perspective Correction module works by effectively rotating the image such that it appears that you are looking straight down at the scene instead of at an acute angle. When viewing straight down at the scene square objects will appear square and object sizes relative to each other are comparable.
Note that the Perspective Module is only working with the current 2D image and is unable to perform a true 3D rotation due to the lack of data. However, despite this limitation a perspective undistorted routine is a very valuable tool to have for image processing.
Interface

Instructions
1. Tilt - specify the amount of perspective correction to apply to the current image. Note that the perspective correction is quite sensitive so the tilt number will be very small typically around 0.001 to 0.003.
2. Transform X - select to apply the perspective transform to the horizontal axis. Applying the transform to the horizontal axis will expand the image towards the top to undo the horizontal shrinking of objects due to perspective.
3. Transform Y - select to apply the perspective transform to the vertical axis. Applying the transform to the vertical axis will lengthen objects that are shortened due to perspective.
4. Scale - specify a number greater than 1 to zoom into the image, specify a number less than 1 to zoom out of the image.
5. Stretch X - manually stretches the image in the horizontal direction.
6. Stretch Y - manually stretches the image in the vertical direction.
7. Image Size - specifies how to crop the image dimensions based on the result of the transform. Note that the transform can create very VERY large images if a high tilt rate is specified. Use the Image size selections to automatically crop the image to a workable size.
8. Pixel & Bilinear Resample - select the interpolation mode. Pixel is fastest but blocky. Bilinear is smooth but slower.
9. Grid Size - specify a grid size that will be superimposed over the current image to help in alignment.
10. Fill Color - specify the color used to fill border areas that are out of bounds of the image. As the image is warped in a non-square way there will be gaps between the image and the edge borders. The fill color specifies what color is used to fill in these areas.
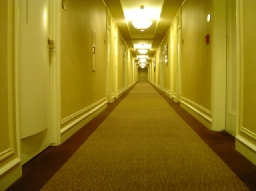
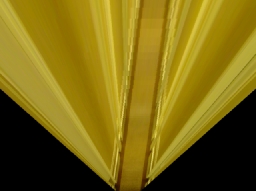
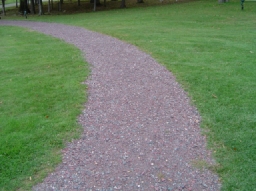
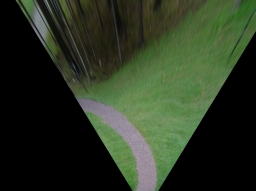
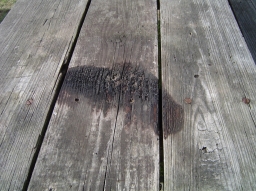
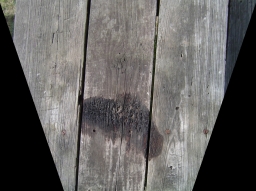
Example
| Source | Corrected |
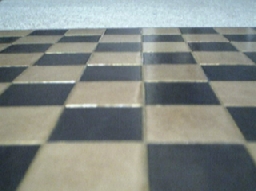 | 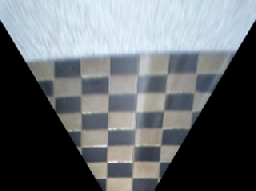 |
 |  |
 |  |
 |  |
 |  |
See Also
Affine
Radial
| New Post |
| Perspective Related Forum Posts | Last post | Posts | Views |
 Sign Recognition
Hi. I have developed a mobile robot which follows line marked on the floor, basically line following robot using RR. I would lik... |
14 year | 3 | 4523 |
|
tilt koeficient
Hi STeven is possible to know what mathematical equation is behind Perspective correction that is u... |
15 year | 2 | 4200 |
|
StrchX StrchY
Hallo! I have a problem with prospective modul. I need to change parameter in additional transforms... |
15 year | 2 | 4211 |
|
How does RoboRealm computes Perspective Transformation
Hi, RoboRealm has a module for perspective correction (http://www.roborealm.com/help/Perspective.ph... |
15 year | 6 | 6748 |