
Fisheye Transform
The Fisheye Transform performs an unwarping of an image in order to produce a more usable image with regards to lines and distortion effects produced by wide angles lens. Similar to the Radial Distortion and Spherical Transform this module assumes a circle image taken from a wide angle lens and provides you with many image warping controls in order to rectify the image. Note that this module is functionally the same as the Radial Distortion but offers more intuitive controls for manipulating the image.
Interface
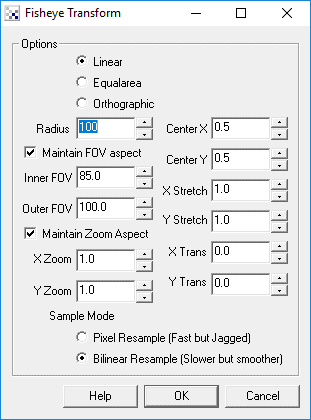
Instructions
1. Linear,Equalarea, Orthographic - Select what type of lens you are using in order to unwarp the image. If you are not sure which type you have simply try each and see which provides the best results.
2. Radius - Specify the radius of the circle within the image. The objective here is to increase or decrease this value until the edges of the image become as straight as possible. Either changing the number directly or by clicking on the up and down arrows you will be able to interactively explore which number works best.
3. Inner and Outer FOV - The FOV parameters define the amount of curvature the lens creates. The inner FOV will warp the inner most part of the image towards the center of the image (to undo the enlargement of objects in the image center) whilst the Outer FOV will increase objects size in the outer parts of the image. Together they provide an un-warping effect due to the wide angle lens.
4. Zoom X,Y - If the transform creates a resulting image that is larger than the current image use the Zoom number to reduce (or increase) the size of the image such that you can see as much of the valid image data within the current image viewing area. Note that you can uncheck the "Maintain Zoom Aspect" to zoom the X and Y directions independently. This may be needed if your lens is slightly oval rather than a perfect circle.
5. Center X,Y - Use the Center values to move the center of the sphere to the right location. If your resulting transform appears to be lopsided try increasing/decreasing the center values to find the exact middle of the lens within the image.
6. Stretch X,Y - To stretch the image in the X and/or Y direction change the numbers accordingly. Note that this does not affect the transform in the way that the previous numbers do. Stretching simply resizes the final image transform to other dimension and adjusts the pixels accordingly.
7. Trans X, Y - If your resulting transform is not quite centered in the viewable image area use the Trans X,Y to shift the image in the appropriate direction to maximize the image area taken by the transform.
Example
| Source | Unwarped |
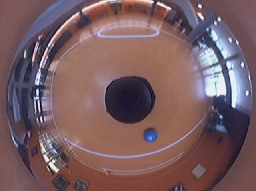 | 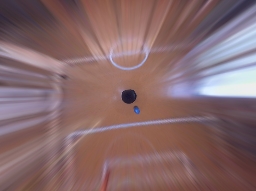 |
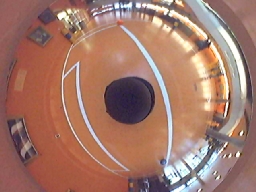 |  |
See Also
Radial Transform
Spherical Transform
Polar Transform
| New Post |
| Fisheye_Transform Related Forum Posts | Last post | Posts | Views |
| None |
