
IONMC_RoboClaw
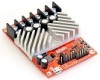
The IONMC_RoboClaw provides an interface from RoboRealm to the RoboClaw distributed by ION Motor Control. The RoboClaw accepts multiple types of inputs (including PWM) but the module is created to interface via a serial interface in order to take advantage of the quadrature encoder inputs that the controller supports. Having PID loops calculated and reacted to onboard the controller allows for quick reaction time and offloads this time consuming function from other computing devices.
This module expects to communicate with the RoboClaw using Packet Serial Mode. See the documentation for your specific device to configure it to receive that form of communication. The assumed address/ID is 128.
Interface
Instructions
1. COM Port - Select the COM port for the built in USB to serial adaptor. You will only see COM ports that are recognized by your computer. Note that direct serial connections normally use com ports lower than 4 whilst virtual COM ports created by USB connections are much higher. You will know when you have the right COM port by the population of the Controller Model text seen next to the stop button.
2. Baud Rate - The connection speed. No reason to change from 38400 unless your serial adaptor is slow or over a wireless link. Set the corresponding baud rate on the controller using the IonMotion app.
3. Motors - After specifying the COM Port you should be able to move your motors by dragging the sliders to the right or left or by specifying a number within the "Current Value" text box in the Motors area. If the motors do not move (or whine) check your COM Port setting and/or board connections.
4. Variables - Select the appropriate variables that contain or will contain the position value that will be sent to the RoboClaw. This is used to automatically change the motor values based on your VBScript (using the SetVariable function) or Extension based program or other modules. See Variable Control for more information on how to programatically move the robot.
6. Current Value - To manually set the motor position type in the appropriate number (-1000 to 1000, 0 is the default neutral/stop) into the text area or use the slider to adjust the value. The motor speed will be updated as appropriate.
7. Min/Max Limits - You can also use the min/max limits to ensure that even if the variables specify large or low values (due to programming errors) that the robot does not actually attempt to move the motors above or below the specified limits. This can be used as an additional precaution in case you are testing your robot in a precarious position.
8. Encoders - To enable the encoder area click on the group checkbox. This will enable the encoder readings and display the number of encoder ticks that the robot has traveled. This also switches the motor commands to now utilize the encoder feedback. You may notice a speed change by enabling this checkbox.
If you enable this area and then move the robot using the Motor sliders you will see the encoder values change depending on how fast the robot is moving. Specifying variables in the dropdown will cause those variables to be set to the current values read from the robot. Also note the "Reset" button that can be used to reset the encoder values on the robot to zero.
9. Kp, Ki, Kd - Specifies the Proportional, Integral, and Derivative values that the RoboClaw uses to maintain speed. The board uses these values in a formula to adjust the actual motor values to be different than that of the desired motor values to ensure that the motors are actually moving in such a way that best represents the desired speed. For example, if you are traveling along a flat surface with motor speeds set at 30 (slowly forward) and suddenly encounter a hill this slow speed will not suffice to get the robot over the hill. With the PID loop enabled the lack of actual motion will be sensed by the reduced encoder count and cause the motor PWM values to increase such that the encoders continue to report the same count. Thus the robot will not slow down when encountering a hill. See Wikipedia for more information about PID loops.
10. Encoder Pulse Rate - The RoboClaw will drive the motors based on the pulse rate received from the encoders. As you may use different encoders this rate may differ. If you notice that the wheel decreases in speed when the encoders are enabled increase this number untill its about the same rate as the non-encoder speed when the robot is raised on blocks (i.e. does not experience any weight). When the speed is about the same with or without encoders you can be sure that the full speed range is being used and your encoder pulse rate is set correctly. The default of 40 is set to the US Digital encoders.
11. Battery - once the RoboClaw is communicating with RoboRealm you can turn on the battery monitor to test the connection. Do this by simply selecting the Battery area checkbox in the interface. The power level will be shown in blue bars with the number of volts in the "Current Value" textbox. If you want to use the volts within other areas of RoboRealm select a variable that the module will write the number of volts to. This variable will then be updated each time the RoboClaw module is run with the current voltage of the robot. Note that this value is multiplied by 10 to keep things in integer format. (You can divide by 10 to get the actual voltage).
12. Temperature - You can monitor the temperature of the board by selecting and typing in a variable that will receive the temperature of the board in Celsius.
13. Motor Current - In order to detect a stuck motor or when the robot is in trouble you can check the Motor Current values and use those to stop any commands getting to the robot in case of high current use. The Motor Current can be saved in variable which can be checked in programming modules or using the If_statement module to verify that they are within acceptable bounds.
14. Stop - press the stop button to quickly stop the motors. The motor controls will then be disabled (in case variables are selected) and will only restart when you click the same button again (now renamed to "Start").
See Also
BasicMicro RoboClaw v1
Phidgets Motor Controller
Dimension Engineering Sabertooth
For more information
ION Motor Control RoboClaw Manual
| New Post |
| IONMC_RoboClaw Related Forum Posts | Last post | Posts | Views |
| None |