
Digital Video Recording system (DVR)
The DVR module is a third party module that provides video recording functionality.
The DVR plugin is distributed outside of RoboRealm.To Install
1. Please download the zip file.
2. Extract the files in the c:\Program Files\RoboRealm\ folder. You will need admin permissions to do so. You may need to unzip to your desktop first and then copy the files to the RoboRealm folder.
3. Verify that the avm061.dll is in the RoboRealm folder and that the Navigator.dll and DVR_Server.dll is in the RoboRealm\Plugins folder.
4. Restart RoboRealm.
5. Look in the Plugins section in the Contents tab or type in DVR in the Search tab.
You can use the "DVR Client-server" package as a Video Surveillance System in which parametric data (such as VR_VIDEO_ACTIVITY) from different video cameras will help you search for a video fragment that you are looking for.
You can use the "DVR Client-server" package as a powerful instrument for debugging your video processing and control algorithms that provides access to the values of your algorithm variables that were archived during recording.
Technical Details
�- ring video/parametric archive with duration of 1 - 12 months;
�- configurable database record (for parametric data) with maximal length of 190 bytes;
�- writing of parameters to database with discretization 250 ms;
�- the DVR Client can work simultaneously with four databases that can be located at remote computers.
Setup
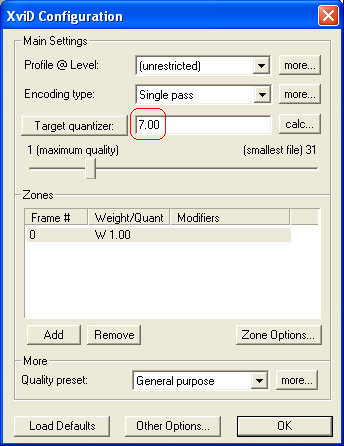
- The "DVR Client-server" package uses the XviD codec for purpose of video archiving. Therefore, you should install the XviD codec before using the DVR module.
- Activate the dialog window of XviD Configuration (choice a "Xvid / Configure Encoder") and then set the "Target quantizer" parameter to 7.0 or higher.
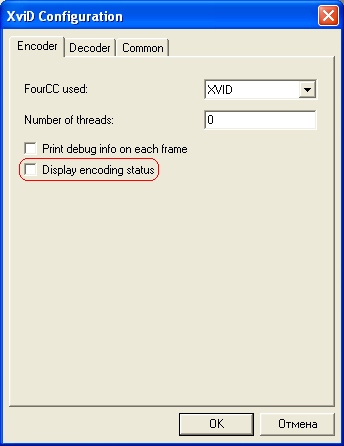
- Click the "Other Option" button and then disable the option "Display encoding status".
- Install the RoboRealm package with DVR Server v0.1 (or higher) plugin.
- Start RoboRealm after installation and add DVR Server plugin to video-processing pipeline.
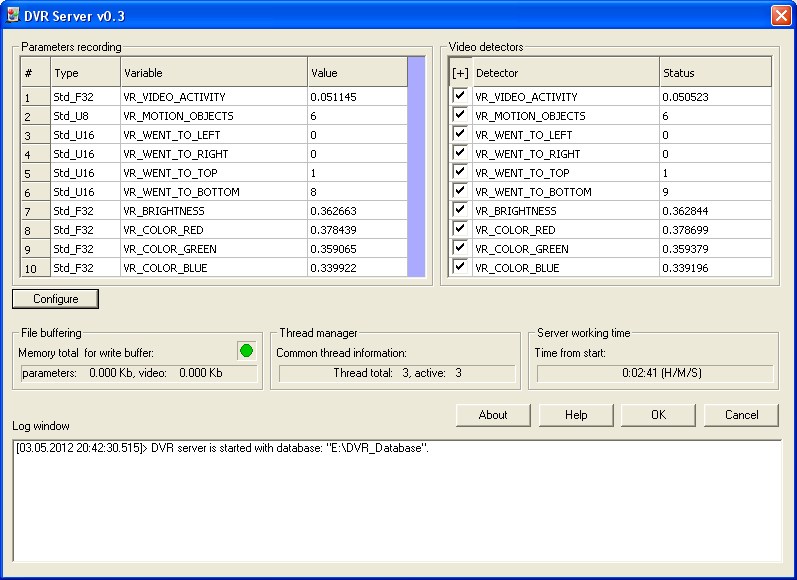
- Activate the dialog window of DVR Server (click on it at video-processing pipeline). Then choose the database directory location.
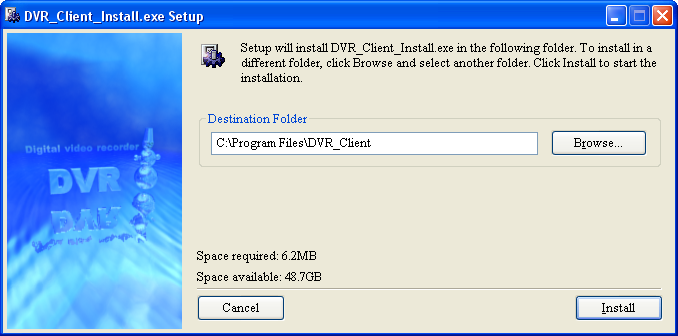
- After the RoboRealm installation you should install DVR_Client_Install.exe package. When installation is complete you should set the database directory path in the client program (chose a "Service/Configuration/Camera #1 database path"). Now the DVR Client is ready to work.
DVR Server configuration
- Call the dialog window of DVR Server (click on it at video-processing pipeline) and click on the "Configure" button.
- Now you can configure record length (16 - 190 bytes) of parametric database and change archive duration (1 - 12 months). Also you can change the database directory location by clicking on the "Select directory" button.
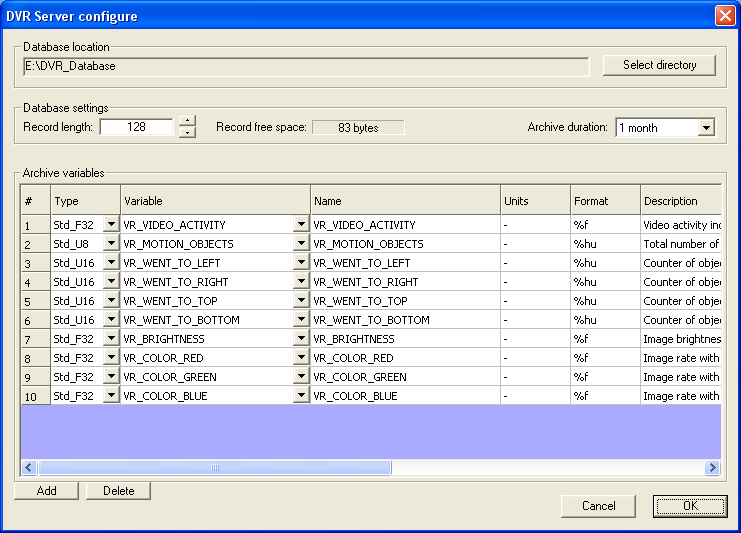
- You can then create a variable list of database records. Click "Add" button for adding of new description entry for the archive variables table and then select a variable from drop-list and choose the variable type:
|
Name |
Description |
Size |
Range |
|
Std_U8 |
Unsigned small integer |
1 |
0 to 255 |
|
Std_S8 |
Signed small integer |
1 |
-128 to 127 |
|
Std_U16 |
Unsigned short integer |
2 |
0 to 65535 |
|
Std_S16 |
Signed short integer |
2 |
-32768 to 32767 |
|
Std_U32 |
Unsigned integer |
4 |
0 to 4294967295 |
|
Std_S32 |
Signed integer |
4 |
-2147483648 to 2147483647 |
|
Std_U64 |
Unsigned long integer |
8 |
0 to 18,446,744,073,709,551,615 |
|
Std_S64 |
Signed long integer |
8 |
−9,223,372,036,854,775,808 to +9,223,372,036,854,775,807 |
|
Std_F32 |
Floating point number |
4 |
+/- 3.4e +/- 38 (~7 digits) |
|
Std_F64 |
Double precision floating point number |
8 |
+/- 1.7e +/- 308 (~15 digits) |
- You can edit a variable name that will be displayed in tables and trends (if it needed).
- Specify units in which variable is measured.
- Specify the printing format for the variable for displaying in tables and trends (see sprintf format specifiers).
- Specify variable's description for displaying as additional information in DVR Client program.
- Specify Min and Max limitation for correct scaling of variable in trends.
- Specify "Show" flag for variable displaying in tables or trend or both.
DVR Client configuration
- You should call the client configuration dialog window (choice a "Service/Configuration") for the configuration of the database path and displaying variables in the main DVR Client window.

- You can configure staff of displaying variables in tables and trends from "Create frame" dialog window (choice a "View archive/New frame").
You have to press "Save frame" button for accepting of changing and then you should close and open again table or trend window for refreshing of variable staff.
- Choose the "View archive/Trends" or "View archive/Tables" for calling of tables or trends dialog window.
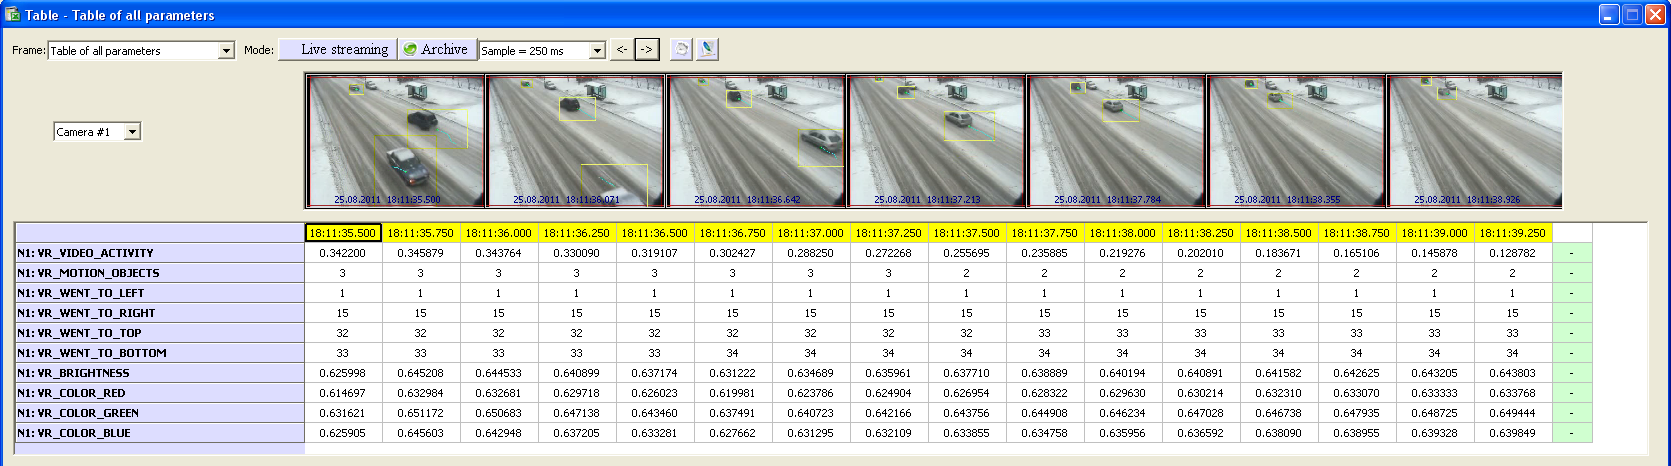
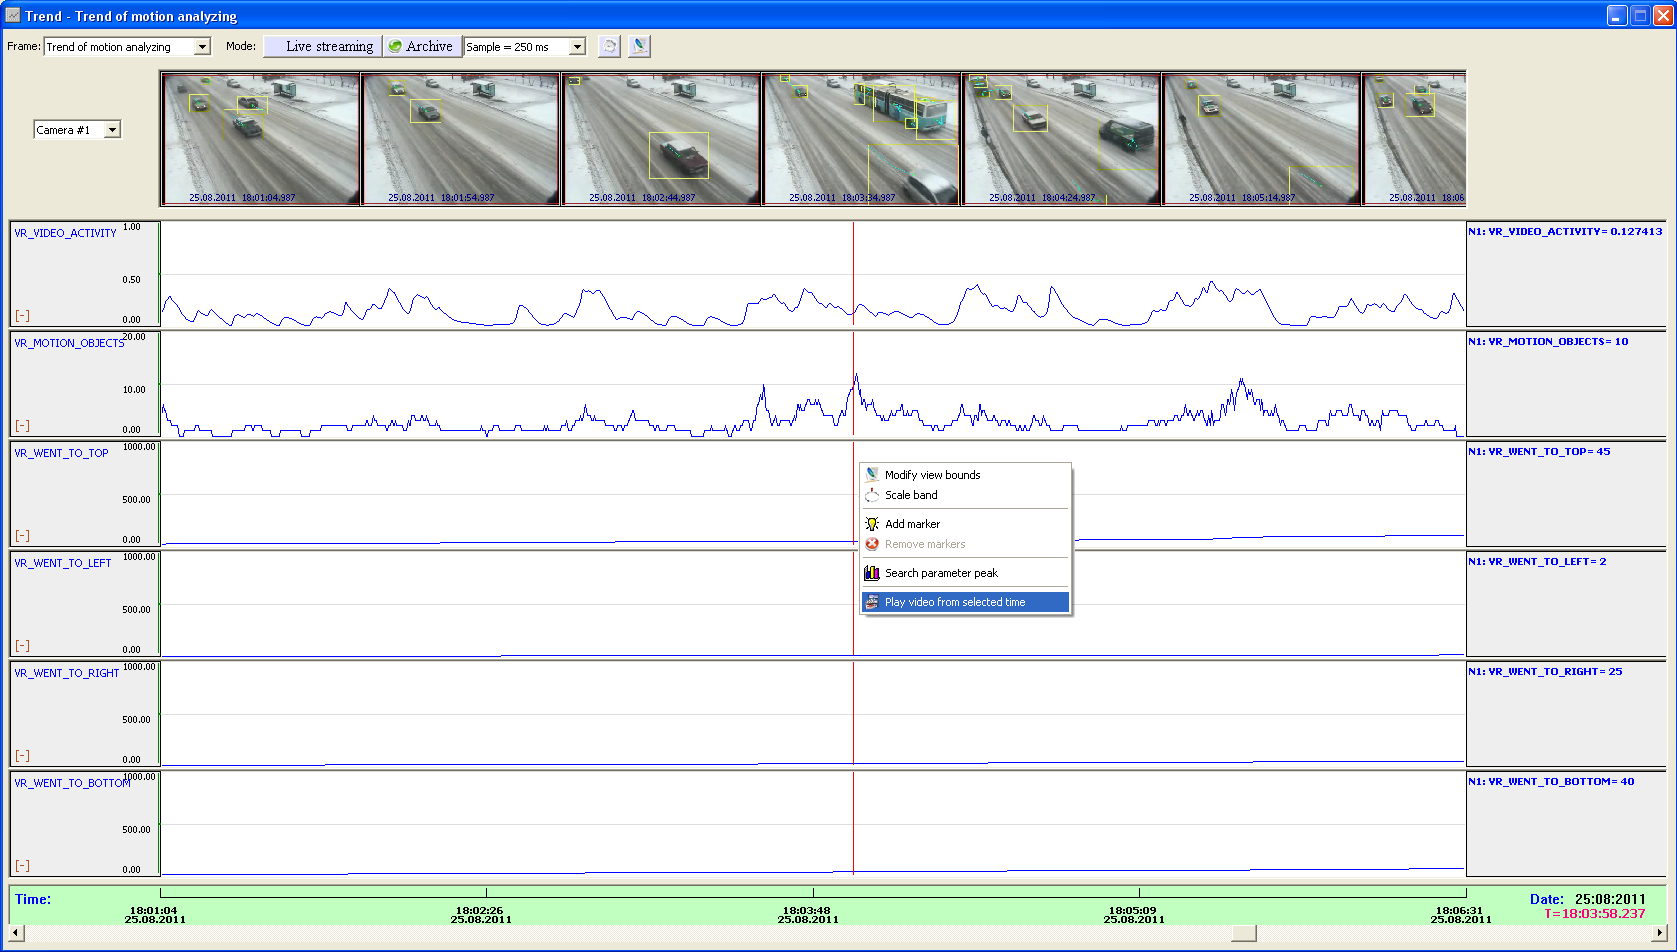
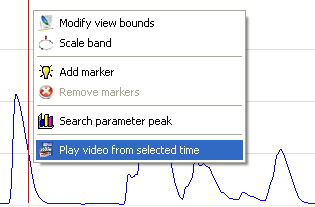
- Double-click the left mouse button on video bar for playback or click right mouse button on the trend for popup menu activation and then select "Play video from selected time".
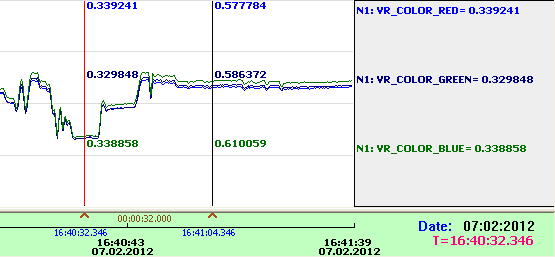
Video detectors
- You can use information that was archived from video detectors for quick searching of video fragment that you need. For example it can be splash of brightness, color or number of motion objects.

|
Video detector |
Description |
|
VR_VIDEO_ACTIVITY |
Video activity indicator |
VR_MOTION_OBJECTS |
Total number of motion objects |
VR_WENT_TO_LEFT |
Counter of objects that went to the left |
VR_WENT_TO_RIGHT |
Counter of objects that went to the right |
VR_WENT_TO_TOP |
Counter of objects that went to the top |
VR_WENT_TO_BOTTOM |
Counter of objects that went to the bottom |
VR_BRIGHTNESS |
Image brightness rate |
VR_COLOR_RED |
Image rate with red color |
VR_COLOR_GREEN |
Image rate with green color |
VR_COLOR_BLUE |
Image rate with blue color |
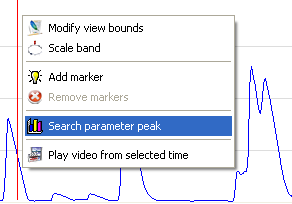
- For searching of the parameter peaks you should click right mouse button on the trend for popup menu activation and then select "Search parameter peak".
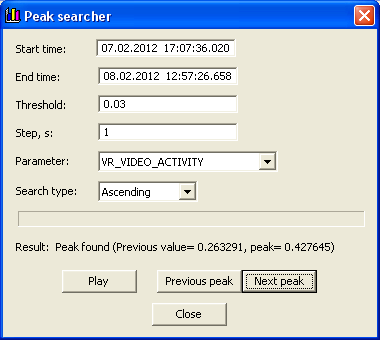
The "Peak searcher" dialog allows you to select time interval for searching (Start/End time), select an acceptable rate threshold of parameter acceleration and a search step. Also you can choose a parameter and the search type (ascending or descending). You can use buttons "Previous peak" and "Next Peak" for navigation between peaks and button "Play" for viewing of the video from position where peak was found.
Trend markers
- You can use markers for more obvious presentation of parameter values in the trends.
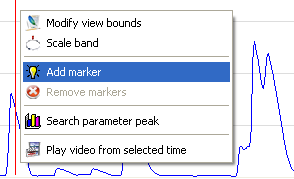
You should use "Add marker" or "Remove markers" popup menu items for markers setting or removing.
Interval selection
- Press the left mouse button and pull mouse cursor to the right side of the trend for activation of interval selection.
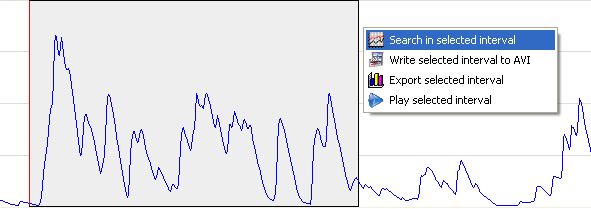
Further in popup menu you can choose: peak searching, writing video to AVI, exporting parameters to Excel or viewing of selected fragment of video.
See DVR-Client demo video for more details regarding user interface.
| New Post |
| EDV_DVR Related Forum Posts | Last post | Posts | Views |
 DVR plugin not found
HI, I am new to here. I need to installed DVR plugin to Roborealm. I c... |
11 year | 2 | 3737 |
|
STeven, the attached program works with multiple images from file. If ... |
11 year | 3 | 4113 |
|
New DVR Client version is released
Finally new DVR Client v2.0 is released and you can download it from here: ... |
14 year | 3 | 7921 |