|
Pinch?
Annika from United States [14 posts] |
13 year
|
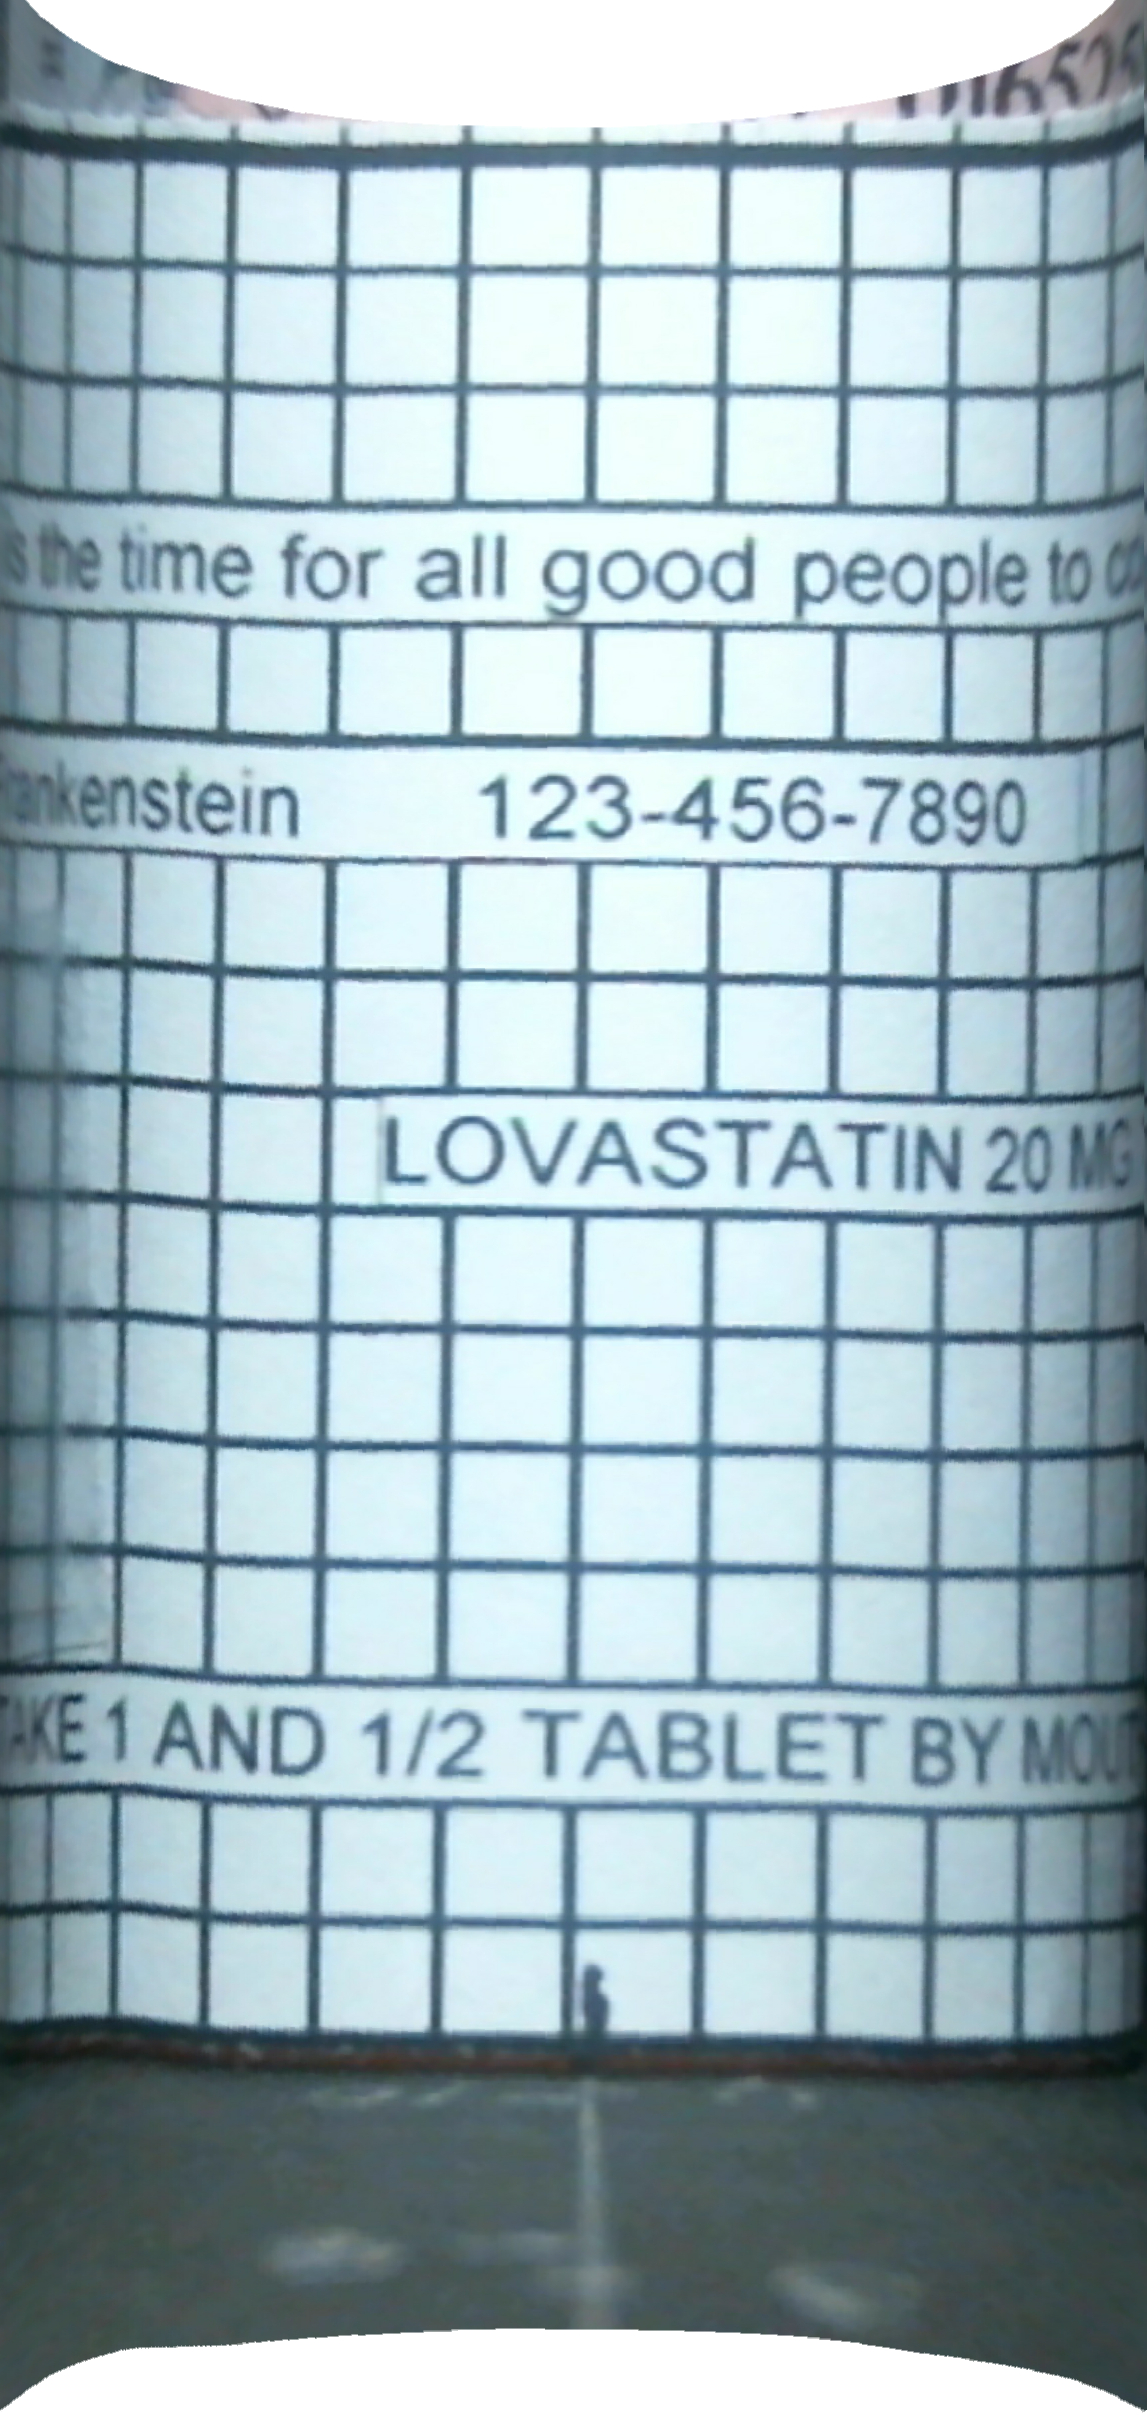
I've been trying to flatten out the text on the prescription bottles, and the closest I have come is using bottle unwrap along with the pinch option.
What I need is something like Gimp's distort "curve bend", which can use multiple points to simulate an ellipse, like the top and bottom of a cylinder. When I approximate this manually in Gimp, I get a nearly perfect result. Is there anything like the curve bend in RR?
|
|
|
|
Carl from Your Country [1447 posts] |
13 year
|
There isn't an exact counterpart for a couple of reasons. As the curve you specify is manually done, as soon as the object moves in whatever way, that curve will no longer be valid and instead distort the image. What you are probably looking for is a calibration of the camera followed by the unwrap module which will do a much better job generically speaking in doing what you want. (i.e. Radial Unwarp followed by Bottle Unwarp).
Nevertheless, we are always looking for cool new modules so if this makes sense and works for you, we may add exactly that. Could you post a couple images that you are working with so that we can verify what the best approach is?
STeven.
|
|
|
|
Annika from United States [14 posts] |
13 year
|
Absolutely, here are the images I am working with currently.
I'm processing still images, so movement would not be an issue, and generally an elliptical curve is what I need because the object is cylindrical. I believe an ellipse would do the trick, with the width of the curve equal to the that of the image and the height adjustable.
 cropped.zip cropped.zip
|
|
|
|
Carl from Your Country [1447 posts] |
13 year
|
Annika,
Ok, I'm getting quite good results too with just the Unwrap module ... can you post the best result that you got using GIMP? I'll send you the robofile to recreate that.
STeven.
|
|
|
|
Annika from United States [14 posts] |
13 year
|
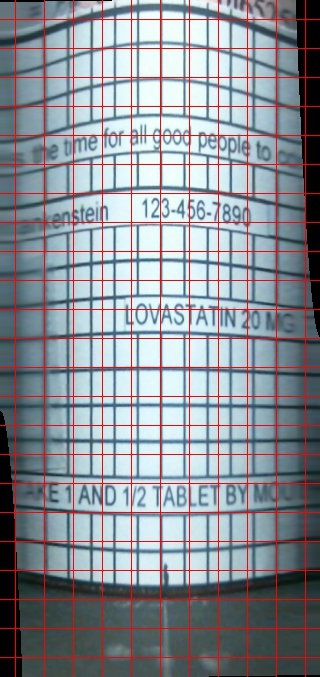
Here's pretty close to what I'd like to see:

|
|
|
|
Carl from Your Country [1447 posts] |
13 year
|
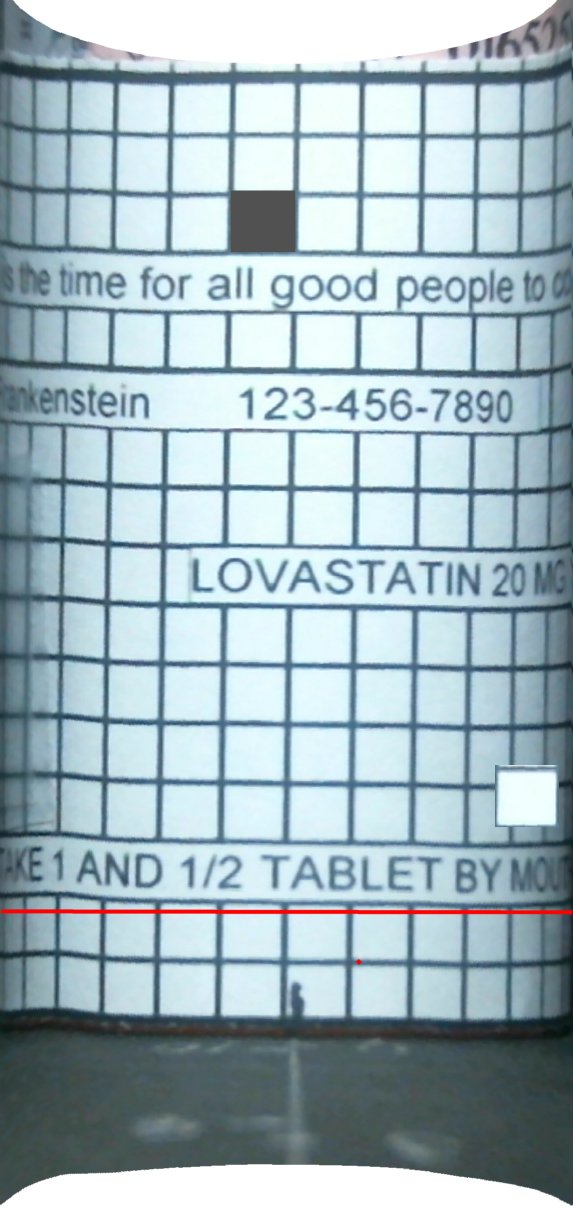
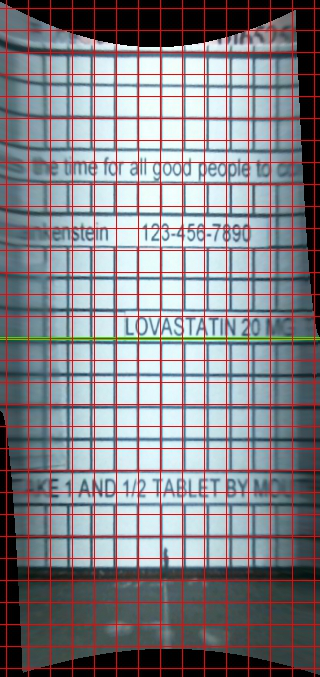
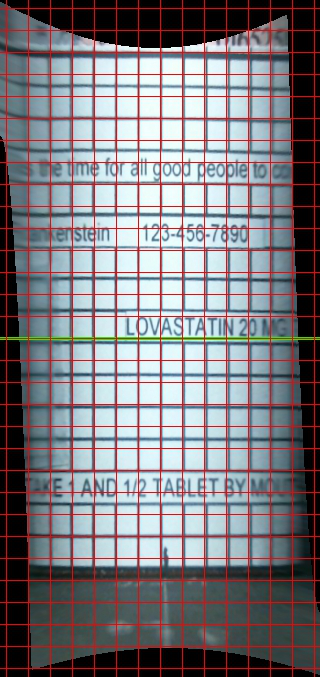
Posted are two images. Your's above and what I was able to get. There are a couple of manual edits shown to test the correctness of the image. One of the center squares is cut and moved to a different location (see the darker square, that's the source square). If calibration is working correctly, those 2 squares should be the same size ... as I'm assuming they are in reality. Note the difference between the two images. The Curve Bend shows a very different sized square which means the warp is not sufficient.
Second a red line is drawn to show the horizontal distortion. Due to the manual curve drawing of "curve bend" you can see the slight irregular warping at the start of the red line. This is caused by the curve not being ideal.
As you can see, the unwrap module does a much better job on getting the squares to be all the same size ... this is required if you plan to stitch the image together or read the text using a fixed width OCR character.
Assuming you agree with this assessment, what we will do is add in the ability to auto-calibrate based on such an image (one with many squares) that will eliminate or reduce the tweaking needed to get a good image. This is probably what caused you to give up and seek other ways of getting things calibrated. RoboRealm has all the right parameters, just determining the values takes a while. With this calibration information and assuming your object stays in relatively the same location, this calibration information should hold across multiple images.
We'll need a couple days to do this so don't expect anything overnight ... and we're not going to start until we've gotten your feedback.
STeven.
 
|
|
|
|
Annika from United States [14 posts] |
13 year
|
This is exactly the sort of result I was looking for, and indeed it was the guesswork of determining the parameters that slowed me down. The grid on the test label is for the purpose of calculation, but I presume once the calibration is done it would work for any object of approximately the same size and location. Keeping the width fixed is definitely preferable to the curve bending method.. I'm very excited by the image you've shown me and look forward to seeing what you come up with. Thank you so much for your help!
Annika
|
|
|
|
Carl from Your Country [1447 posts] |
13 year
|
Yes, that's the thought, use the current image for calibration and then keep things similar for the next images. There will be some distance allowance (i.e. if the object is nearer or further) but only by a bit. We'll see how that works once we have a good self calibration routine working.
I'll post again when we have new progress.
STeven.
|
|
|
|
Carl from Your Country [1447 posts] |
13 year
|
Annika,
Just a small update to let you know that we are still working on this ... our initial trial at auto-calibration utterly failed ... so onto the next technique. Note this is very normal process in the field of machine vision, you fail more often than you succeed even if you've been doing this for years!
STeven.
|
|
|
|
Annika from United States [14 posts] |
12 year
|
Hi Steve,
Just wondering if you have made any more progress on this problem. Your sample image looked like exactly what I'm trying to produce, so could give me a hint on how you did that?
Thanks,
Annika
|
|
|
|
Carl from Your Country [1447 posts] |
12 year
|
Annika,
You use the bottle unwrap module but proceed in the following way:
1. Reduce the size down a bit (say 320x677) so updates are quicker. Use the Scale module for this.
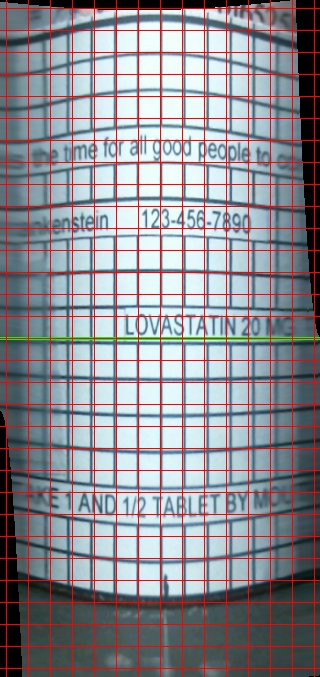
2. Then focus on the Z rotation of the image. You want the lines to be as close to vertical as possible. Switch on the Grid and compare its vertical lines with those in the image.

3. Next use the Y rotation to get the middle horizontal line as horizontal as possible (I used the line display to show which line that is). Note that the top and bottom lines will still be rounded but we'll get to that.

4. Then use the pinch value to get the rest of the horizontal lines to actually be horizontal.

5. Finally use the Radius to get all the squares to be the same width and height.

Note that after step 5 you can also go back and refine the other params as their effects on the image will now be enhanced. If you set the grid to the expected size of 23 pixels that can really help to tell when you are close.
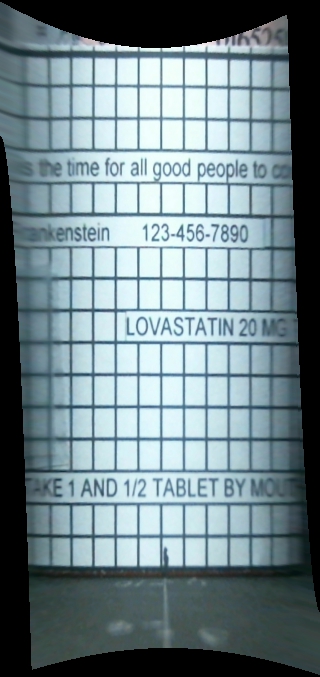
The final image is then

Note that these numbers will change for larger images so if you need the really large version of this same image you will have to tweak the numbers again ... but at least you'll have had some practice.
STeven.
 program.robo program.robo
|
|