|
Obstacle Avoidance Tutorial question
Win Heagy from United States [31 posts] |
17 year
|
In the obstacle avoidance tutorial, I followed the steps using edge detection, and it worked well, up until the final steps where image math was applied to combine the original image with the highest point region. I set up the math modules identically to what is in the tutorial, but all I get is a black image. It works if I use the sample provided, but if I try to use my own live video, it does not work. Does this technique not work with live video...only static images? If so, is there a way to capture a static image from live video and use it for this technique? Finally, if I simply have a static image of my own that I want to replace for the image they use in the tutorial sample, where is that done. I don't see where the image is loaded.
Thanks...Win
|
|
|
|
Anonymous |
17 year
|
Can you upload a sample image?
Nicthegr
|
|
|
|
Win Heagy from United States [31 posts] |
17 year
|
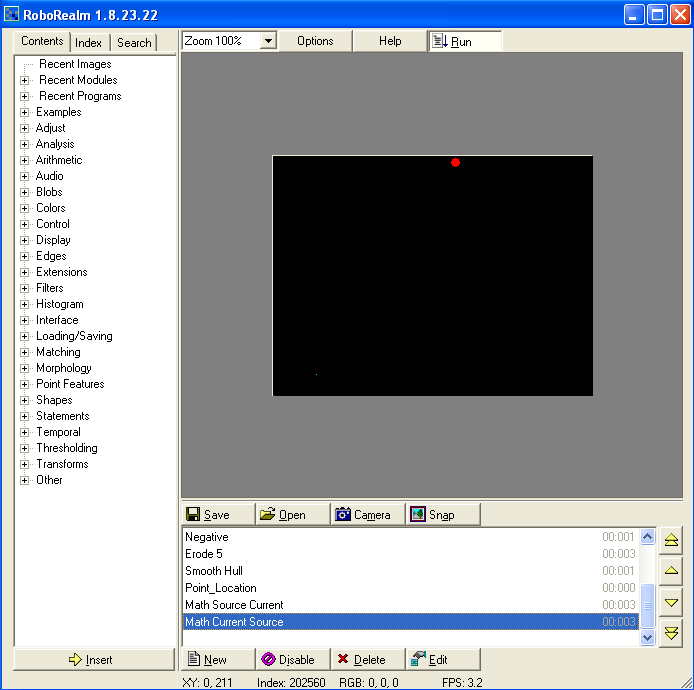
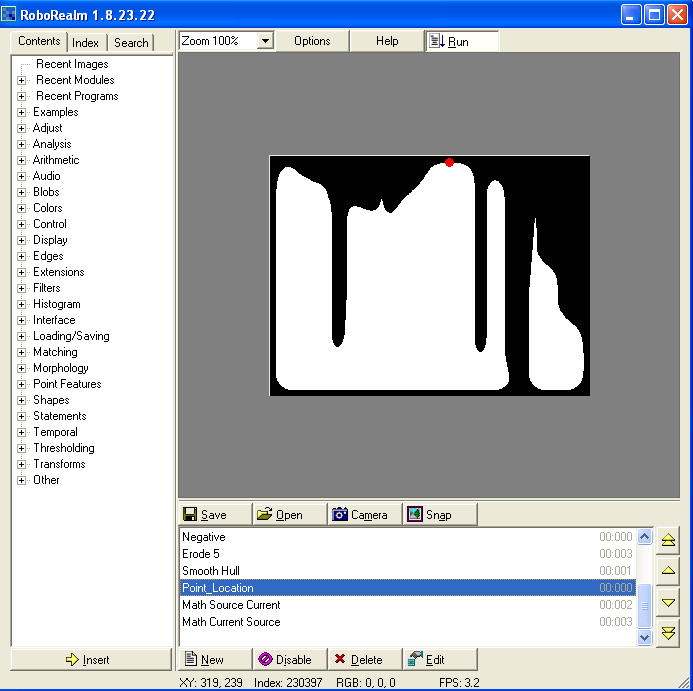
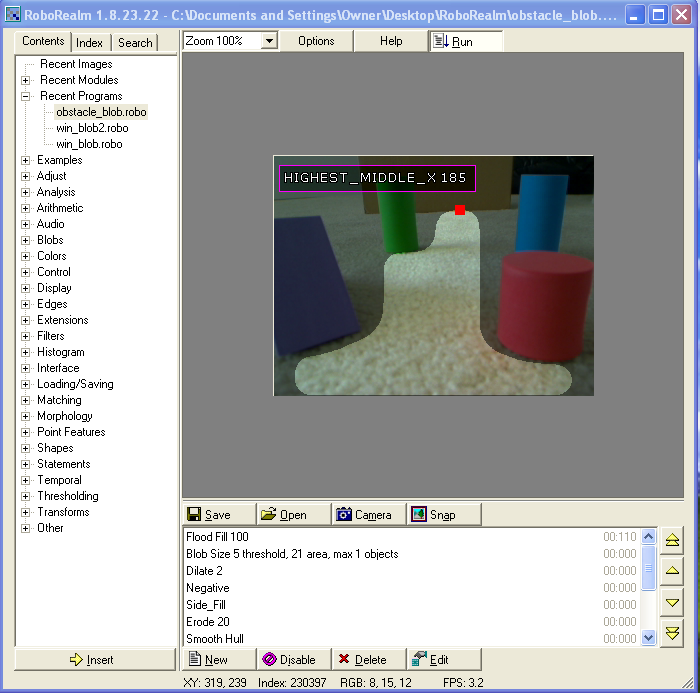
Sure. The first image is the pipeline displayed through the last math module....a black image with the highest point location displayed. The second image is when I backup in the pipeline to the point location module, directly before the math modules. At the point location module, it appears to be working correctly and is based on live video from my SRV-1. These math modules are supposed to allow me to superimpose the processed image with the original video. The third image is the example obstacle_blob code. It seems to work properly with the static image provided in that example. If I load my program on top of this static image, it also works, and displays the processed live video on top of the static image. It just won't display on top of the live video.
Also, how does the example code load the static image? I can't see where that takes place.
Thanks...Win


|
|
|
|
Anonymous |
17 year
|
Win,
The last two modules are really only for display so they could be deleted if they continue to cause issues for you.
But the reason you are having issues is that you are using the SRV. The SRV does NOT appear like a webcam and thus the "source" referred to in the last two modules will not be correct. To fix this situation you will need to add a "Marker" module just after the SRV module and call the image something that you will remember like "SRV_Image" and then edit the last two modules and select the SRV_Image or whatever you called it INSTEAD of the "source". Source will refer to the current static image loaded or the webcam current selected (when the Camera button is pressed).
As the SRV image comes over the network into the SRV module it does not have a name that it can be referred to. But placing a marker module just after the SRV module will do exactly that.
To load in a static image just use the Open button and select and image. The Open button is used to load both .robo and image files. Or you could just drag an image into RoboRealm ... Or you could just paste an image (copied from an image editing program) into RoboRealm. There are a bunch of different ways to load static images ... but the latter 3 should do it for now.
Note that robofiles can have embedded images (see the checkbox in the Save dialog) which is why the image is coming up when you load the tutorial robofile. We thought we would include it as it makes it easier to test. If you don't want the image to appear just resave the robofile with the "embedded image" checkbox turned off in the Save Dialog interface.
STeven.
STeven.
|
|
|
|
Win Heagy from United States [31 posts] |
17 year
|
Steven,
Very helpful! I'll give all this a try.
Thanks,
Win
|
|