|
Getting Pixel Values from RR using Java
Anonymous |
18 year
|
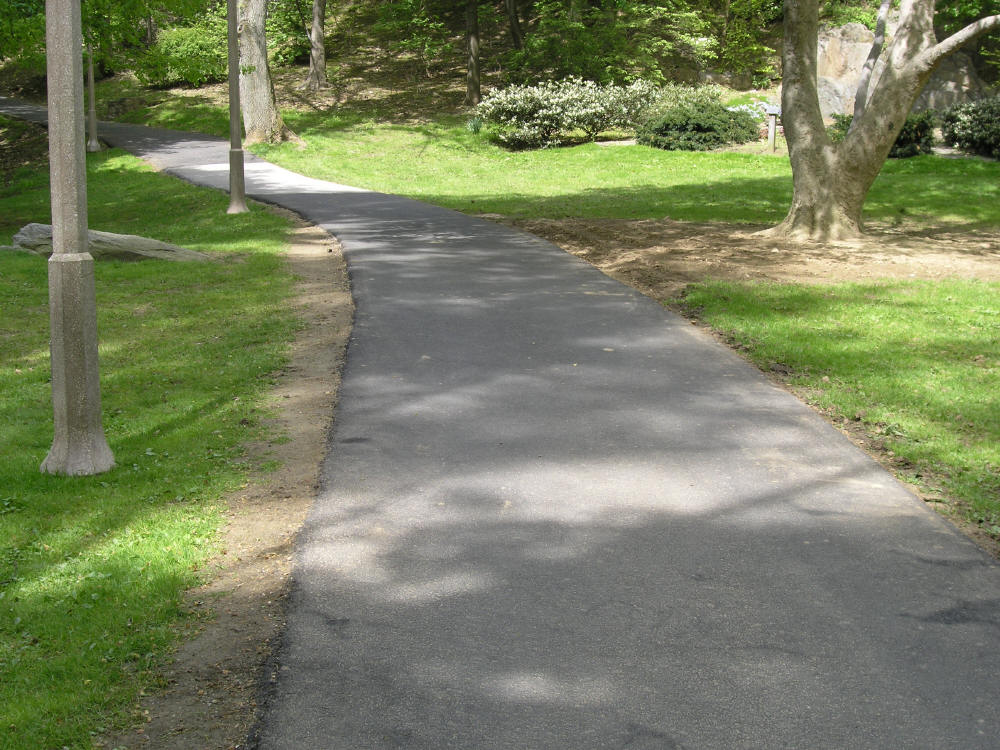
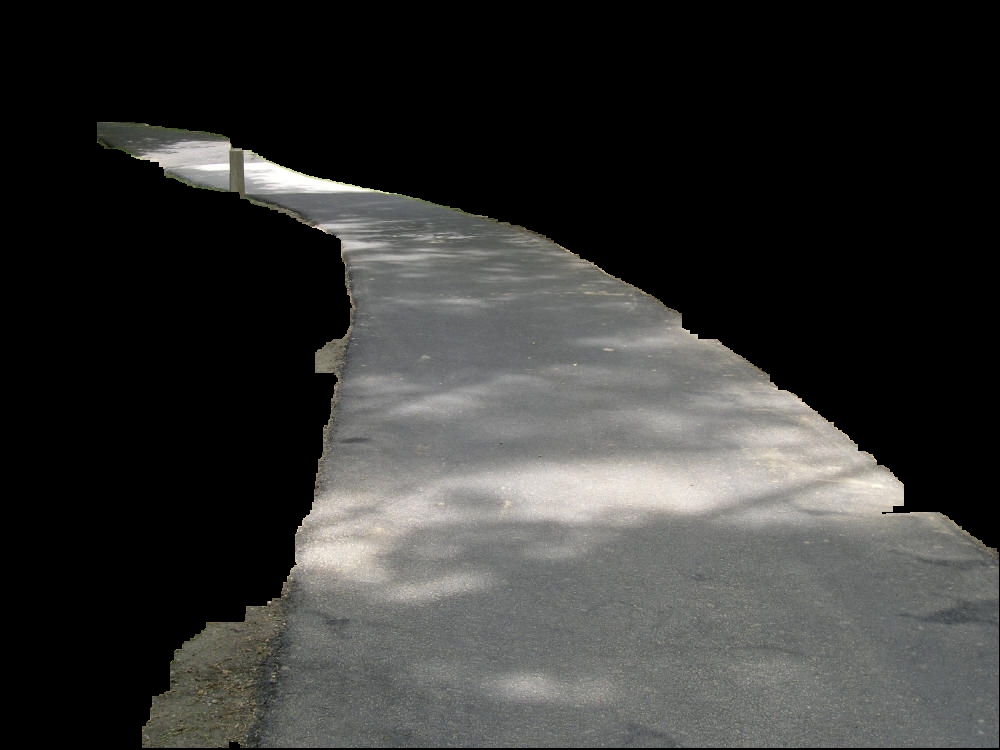
We are using RoboRealm (and its API) to write a program in Java that controls a Powerwheels vehicle using a webcam mounted on the windshield and a laptop on the back. The Powerwheels is fully modified with its throttle and steering controlled through a ServoCenter (and the ServoCenter module in RoboRealm). We have properly established a connection to RoboRealm and written a program to turn the wheels based on the location of a red ball in front of the camera (thanks to the COG). However, our next step is to respond to pavement (vs surroundings) and drive the vehicle staying on the paved path.
We have run (using the execute("...") routine) a floor finder and a blob filter (after a physical lens light filter mounted to the camera) to very effectively find the pavement, masking it white against a black background. The COG does not help us much anymore because the area directly in front of the the robot tends to bring the center of gravity to the bottom center. Instead, we plan to extract a single horizontal line of pixels from the black/white image. The plan is to create an array of values representing the pixels across that stripe and then find the point where they go from black to white and then the point where they go back to black, thus the edges of the pavement, calculate the center of the pavement, and compare it to the center of the image to turn the wheels appropriately.
However, we are having difficulty getting the raw pixel values from the image. We created a byte array (following one of the API examples), and tried to use the getImage(...) routine to fill that array with pixel values, however the array does not appear to be getting appropriate values from getImage, in fact it's entirely zeros, despite the white region in the middle of the image. We hoped to get a single line that looked like 0 0 ... 0 0 255 255 ... 255 255 0 0 ... 0 0 if that makes sense. The camera driver is using RGB24 (it's only option), and we suspect this is our problem. The camera is generating an RGB triple with three 8 bit values for each pixel and getImage(...) is trying to get only a single 8bit value from each pixel. Any thoughts or suggestions on how we might fill an array with either 0 or 255 (black or white) from the processed image?
Thanks,
Reid Anderson and Andy Minton
|
|
|
|
Anonymous |
18 year
|
Hi,
Couple of items to mention:
1. The function you are trying to do by getting the pixels can be done with the Crop module to reduce the image down to a single line, then a form of thresholding or flood fill will create a binary image, then followed by the Point Location module will give you the start and end point of this line. This information can then be received via the Get_Variable API routine ... if you're interested in this send us the final image of your processing and we'll send back a robofile that creates these two end points.
2. The getImage will return a triplet RGB value regardless of if the image is color or black or white. It just standardizes on that format as it is easy to convert from one to the other ... in your case you would just resample that final array at every 3 bytes to create the single value pixel array. Perhaps you could send us a sample pavement image and the robofile that you are using and we'll configure it to reduce to 1 center line that should return a single line of RGB (in this case 0,0,0 or 255,255,255) from the image via the GetImage API function.
STeven.
|
|
|
|
Re: Option 1
Anonymous |
18 year
|
It looks like option 1 is the better route to go...
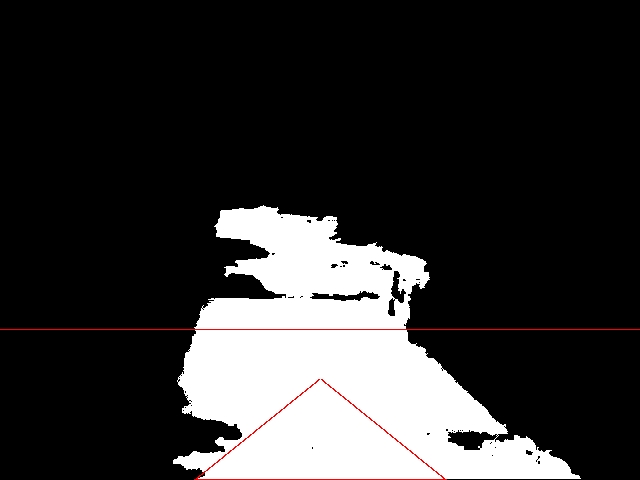
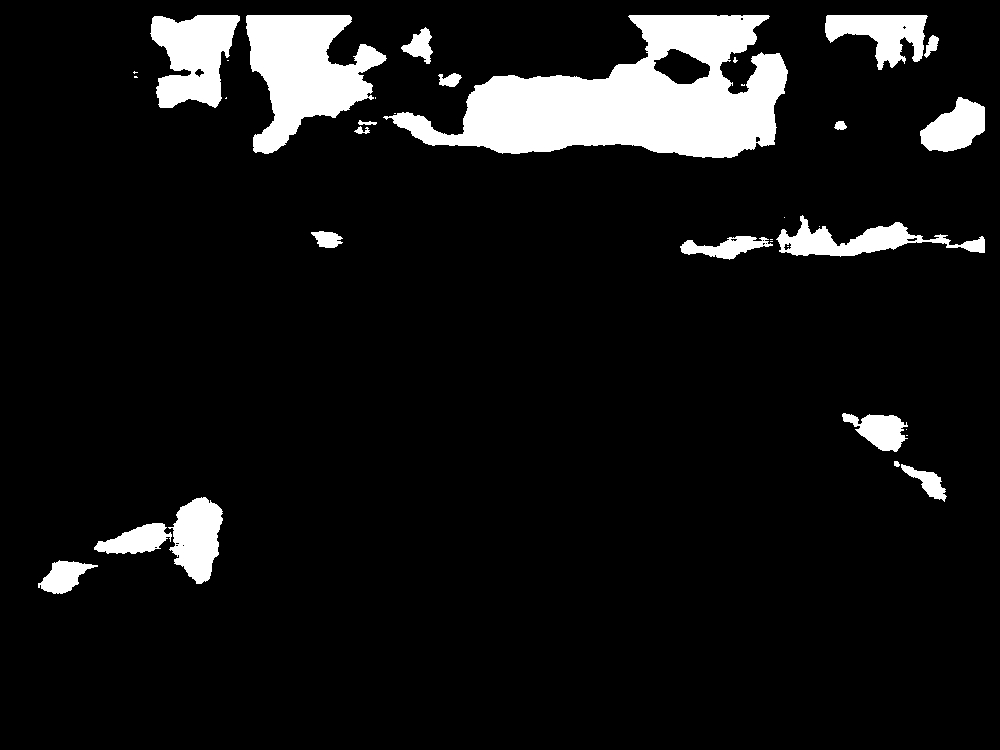
As for the requested items, I have attached a sample of a processed image. You'll notice the triangle from the floor finder, as well as a horizontal line. The line is simply being displayed for our own visual reference to represent the stripe of the image that we are looking at. I believe in this snapshot that Andy has drawn that line 150pixels up from the bottom of the image. He's already working on the Crop to trim that image down to just that line, not sure if he's looked at the Point Location yet. My only concern here is that if we crop the image down to a single line, we'll lose our ability to get a good visual of the processed image from our position walking behind the robot. I guess we could crop the image get the points and then "uncrop" it by running a processing program without the crop, but that seems like a lot of executes to keep going back and forth...
Rather than attaching a group of sample raw images, I have attached one and here is a link to several others (posted on the contest website)...
http://www.ecsel.psu.edu/~avanzato/robots/contests/outdoor/index.htm#Campus%20Path%20Layout%20Pics
Hope this helps,
Reid Anderson and Andy Minton


|
|
|
|
Penn State Mini Grand Challenge
Anonymous |
18 year
|
Reid,
Two main topics here. The first one will cover how to grab the width of the road at a certain point. The other will show what we have so far for the Penn State MGC competition ... yes, we're quite familiar with this topic.
Other links worth reading
http://www.roborealm.com/forum/index.php?forum_id=890
http://forums.parallax.com/forums/default.aspx?f=15&p=1&m=184249#m186063
Ok, #1. The basic idea is to use the crop function to continue the processing on your binary road mask image. BUT you do not want to crop it to a single line since that would be too sensitive to errors. It is better to use a couple lines. In our case we used 10.

This shows the cropped image from line 130 to 140. If you are confused as to which lines to use just have a look at the X,Y numbers in RR's status bar while moving the mouse over the image. That will help you to understand which line numbers to use.
From here we want to check the left and right coordinates. We do that using the Point location module and chose Rightmost and Leftmost (don't worry about the highest, middle, etc. as we are only interested in the X coord.

Note the red x's.
In our test image the coordinates we are interested in are now
LEFTMOST_MIDDLE_X
RIGHTMOST_MIDDLE_X
whose values can be seen using the watch module (double click or edit that one to see the values).
Your API call would then call getVariables to get those two variables. The center of which is probably the best direction to head towards.
Now on to #2.
If you are just detecting the road a better way than using the floor finder which is very subject to highlights AND requires that you always been on the path to follow (which we all know isn't always the case) you can use a combination of filters customized to describe a road. These are the following
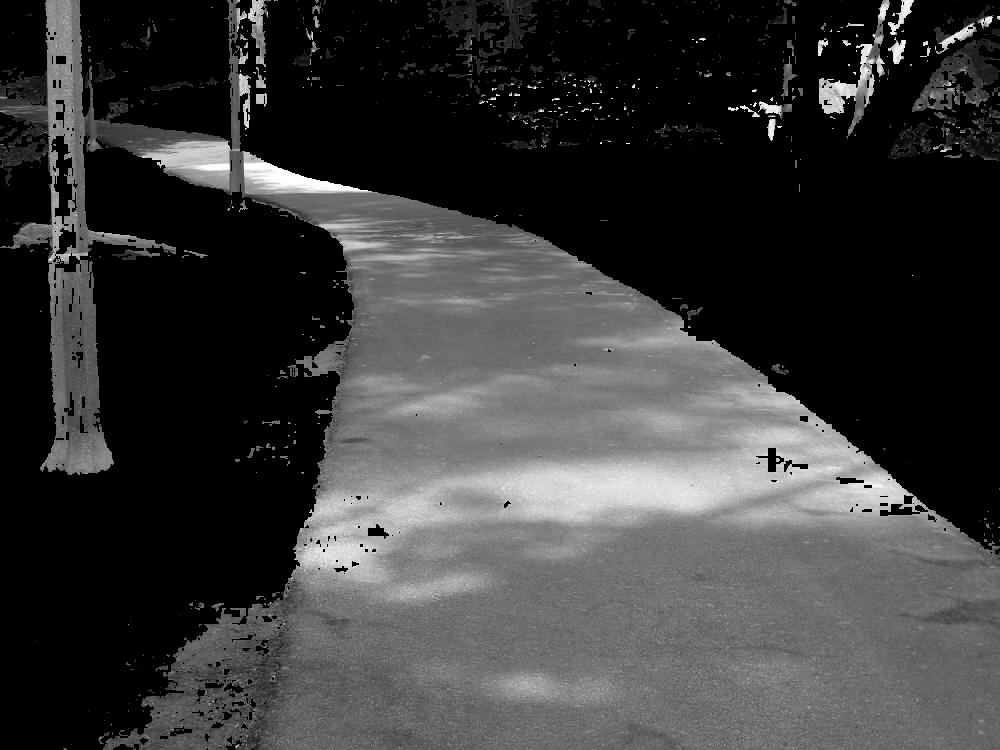
1) A road is normally very low in color (i.e. black, white, gray). We can detect possible roads by detecting gray areas. In your example source image using the RGB_Filter on grey (yea, I know, not really an RGB filter but it works!).

which works quite nicely but also picks up other things like telephone polls, fences, etc and relatively gray areas of grass/dirt.
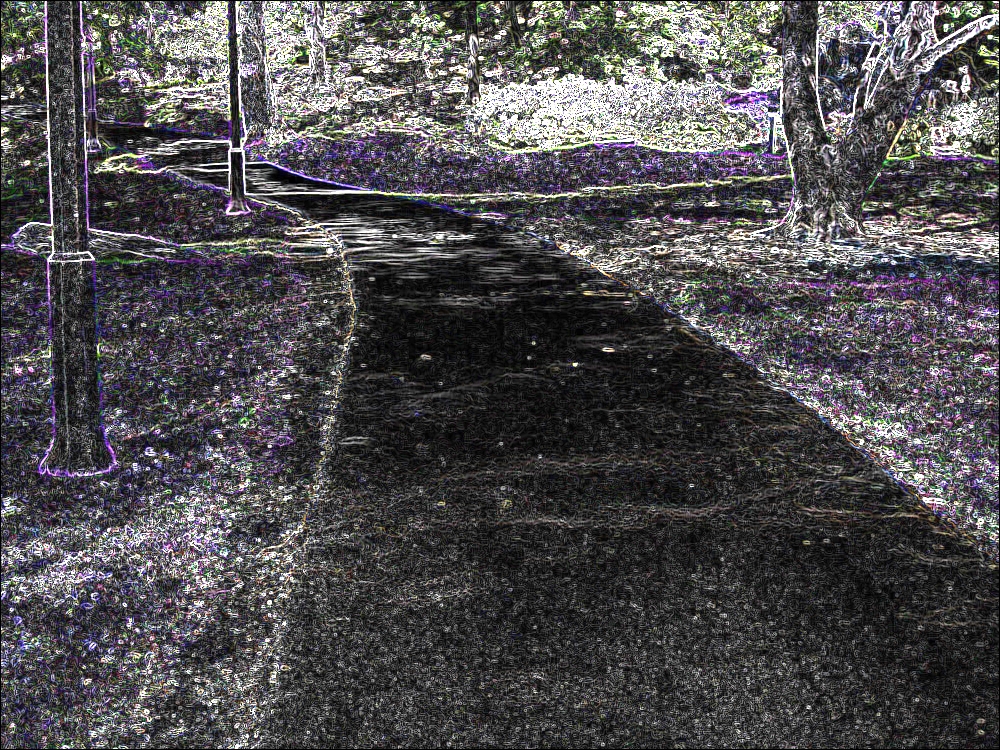
2) A road is normally quite smooth. We can detect possible roads by looking at texture. Using a sobel edge detector combined with a population filter we can detect areas of significant "texture" which are normally not roads.
The sobel

and population thresholded

which doesn't look like much in this case but try some of the other images that have a lot of dirt or textured bushes, etc.
3) Highlights - checking for gray objects is a little sensitive to a really blue sky where hightlights (areas of really white sunlight) can have a blue hue to them that causes problems. In your example image this does not appear to be a problem but for other images in the sequence it clearly creates huge gaps in the road which look like obstacles. So we go back to the RGB filter and select really really bright blueish objects and merge that back into the final image to include highlights. (The floor finder does this trick using the "hightlights checkbox").
We then combine all 3 images into one image and then
1. Fill any remaining holes < 100 pixels
2. Erode by 8 to disconnect objects (if you change to a smaller image size you will need to reduce this number).
3. Select the largest remaining object ... should be the road if one is in view
4. Dilate by 10 to fill out the blob. Note that this will not reconnect the blob to nearby ones since we eliminated all but 1 blob.
5. Once again fill in any remaining holes of any size. (mainly for visual reasons)
6. And finally use this as a mask on the original image so that we can see what we've ended up with.
To result in

Attached below is the robofile.
This is not perfect but it comes close to reliably detecting the road pavement. If anyone finds major issues or would like to contribute please do so ... we're going to continue to think about how to improve this filter.
Note that this will not work to find grassy areas which is a part of the competition ... if you get that far let us know!
STeven.
 program.robo program.robo
|
|
|
|
Not Far Off...
Anonymous |
18 year
|
Ok, so we're really not that far off... Our processing was a Floor Finder followed by a Blob Filter to find the largest blob. We did pretty well with just that. We knew we would need to expand the blob to smooth the edges (or as you say "fill out the blob") but that's easy to do. We worked today (before receiving your response) on the Point Location along a single line (from Cropping). We cropped out everything except for a single line and were reliably able to find the edges of the road (and their corresponding variable names/values). We also tried the cone images and were able to clearly identify the cones across the path. We also tried various objects in front of the path and had them reliably visible. So, we're doing pretty much the same thing, with the exception that you're using an RGB (really Grey) filter, Sobel Edge, and RGB again for Blue where we are using just a Floor Finder.
We've accomplished similar results with a physical lens filter. Our Observatory at Pomfret lent us a blue light filter (no, it doesn't block blue, it only lets in blue). This filter came from an old telescope of theirs and happens to have a diameter nearly perfect to fit on the front of our camera. We put the lens in a carrier and simply rubber banded it in front of the camera lens. This filter allows only specific blue frequencies to pass through, but most importantly, it blocks IR and UV light. We found that IR and UV light were creating a washout effect in the camera making everything ridiculously bright. By eliminating those, the camera picks up only blue light. This is different than a software RGB filter because we're blocking the other colors before they get to the photo sensors in the camera, which are very susceptible to UV and IR. This seems to help out the highlights and washout problems that Floor Finder wasn't so good at originally. By the way, we're snowed in up here in CT, so we've been placing the camera (without the physical blue lens filter) in front of an LCD screen to work on processing right now, so the processed image we attached previously was without the lens filter and not in a real environment. We'll have to send along a photo of the vehicle one of these days... We're hoping that if nothing else, we'll win some style points!
Thanks for the help, we'll digest it and try out the various filters you've suggested and get back to you with progress/problems...
Thanks a ton!
Reid Anderson and Andy Minton
|
|
|
|
Anonymous |
18 year
|
Reid,
thanks for the update. Your experiments with the blue lens is very interesting. As we often mention, software can do some amazing things but is no substitute for good hardware.
One thing we noticed with the floor finder is that it became more reliable if you add the Color_Normalize filter before the floor finder filter. The image colors get flattened which seems to help the floor_finder. (It doesn't look great but seems to work better).
Let us know how it goes and sorry to hear that you're snowed in. That's a problem we would never anticipate on here in sunny Los Angeles!
STeven.
|
|