
Fixing Photos
We've been doing a lot of ebay sales lately to reduce our stock of robotic components. While we're not photographers we do know images. This tutorial goes over a couple of the techniques that we've used to correct our bad product photos into something much more appealing ... as we all know, good photos in ebay make the difference between a good and bad sale.
Following is a couple examples on how to fix bad photos using modules within RoboRealm.
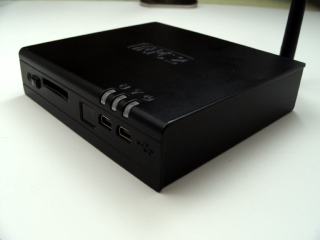
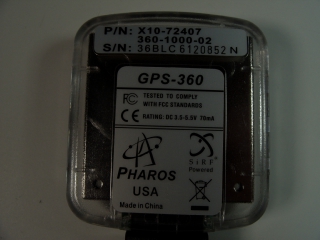 GPS device original photo. Camera switched to bad lighting
during photo shoot. Hard to read text and really see what the device is.
GPS device original photo. Camera switched to bad lighting
during photo shoot. Hard to read text and really see what the device is.
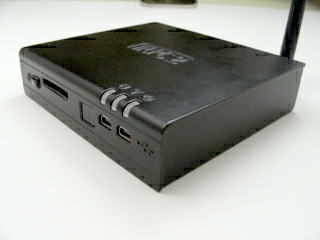
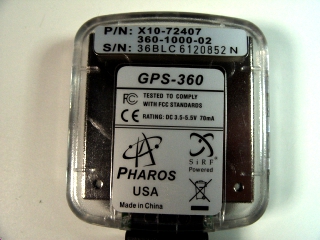 Using the Normalize module
set to ignore 40% of the tailing values the image lighting is significantly improved.
Using the Normalize module
set to ignore 40% of the tailing values the image lighting is significantly improved.
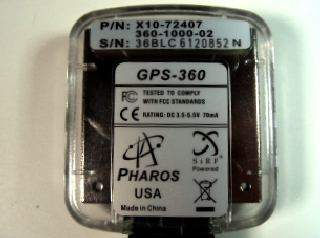 Using the Rotate module
we can rotate the image slightly (by 1.2 degrees) to straighten the image out.
Using the Rotate module
we can rotate the image slightly (by 1.2 degrees) to straighten the image out.
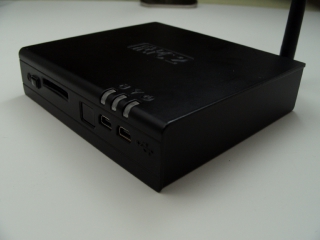 FitPC device original photo. Background is not quite
white.
FitPC device original photo. Background is not quite
white.
 Using the
Normalize module
helps to make it more white. But now the details of the device are washed out by the increased in
contrast.
Using the
Normalize module
helps to make it more white. But now the details of the device are washed out by the increased in
contrast.
 Adding in the Raise Histogram module
will crunch the intensity values in a non-linear way to bring out lower intensity values better. This module will
create a more grayish image but the normalize module undoes this. For objects that are dark colored this
module really helps bring out the details and has been invaluable in improving electronic/circuit details.
Adding in the Raise Histogram module
will crunch the intensity values in a non-linear way to bring out lower intensity values better. This module will
create a more grayish image but the normalize module undoes this. For objects that are dark colored this
module really helps bring out the details and has been invaluable in improving electronic/circuit details.
Download the ![]() fitpc_image robofile to see the steps
and more about the modules used.
fitpc_image robofile to see the steps
and more about the modules used.
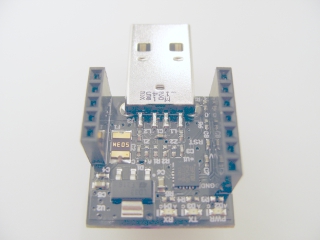
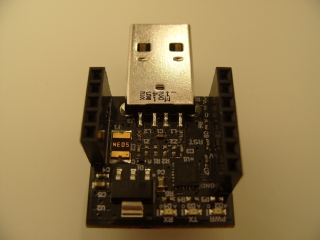 RFDuino (Arduino + Bluetooth) device original photo. Overall
image is colored incorrectly. Bit too much perspective to get an idea on the size.
RFDuino (Arduino + Bluetooth) device original photo. Overall
image is colored incorrectly. Bit too much perspective to get an idea on the size.
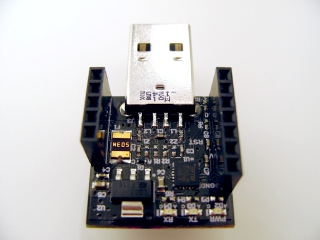
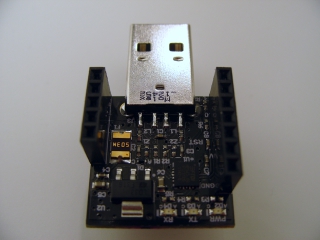 Using the Color Balance module
we can easily fix the incorrect coloring. (default settings)
Using the Color Balance module
we can easily fix the incorrect coloring. (default settings)
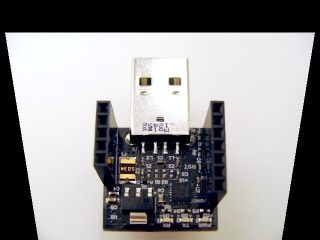
 In perpetration of bringing out the details
of the chip we use the Raise Histogram module. This creates a not-so-nice
looking image but increases the darker areas to be more visible.
In perpetration of bringing out the details
of the chip we use the Raise Histogram module. This creates a not-so-nice
looking image but increases the darker areas to be more visible.
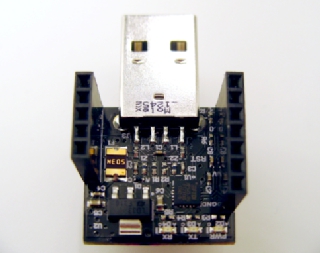
 Using the
Normalize module
fixes the visual issues that the raise histogram module created but still keeps the
details we are looking for.
Using the
Normalize module
fixes the visual issues that the raise histogram module created but still keeps the
details we are looking for.
 Using the
Perspective module we can help reduce
the perspective distortion (the board is square and not triangular) to
make the image appear taken more from above than from the side.
Using the
Perspective module we can help reduce
the perspective distortion (the board is square and not triangular) to
make the image appear taken more from above than from the side.
 Finally using the
Crop module we can remove unwanted parts and scale
to the final ideal size.
Finally using the
Crop module we can remove unwanted parts and scale
to the final ideal size.
Download the ![]() RFDuino_image robofile to see the steps
and more about the modules used.
RFDuino_image robofile to see the steps
and more about the modules used.
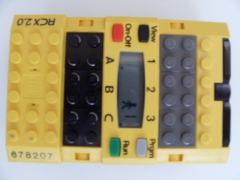 Lego RCX original image. Slightly out of focus
and can't quite see the running man in the LCD interface.
Lego RCX original image. Slightly out of focus
and can't quite see the running man in the LCD interface.
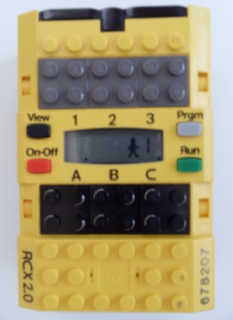 Use the
Rotate module to get the right orientation.
Use the
Rotate module to get the right orientation.
 Multiple use of the
Convolution module with the Enhanced Focus setting
to improve the clarify of the image. Note, there are limits to the usage of this module. Slightly
out of focus can be corrected but the image will become very grainy after multiple uses.
Multiple use of the
Convolution module with the Enhanced Focus setting
to improve the clarify of the image. Note, there are limits to the usage of this module. Slightly
out of focus can be corrected but the image will become very grainy after multiple uses.
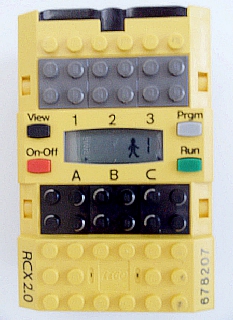 Use of the
Raise Histogram module
to make the contents of the LCD image more legible.
Use of the
Raise Histogram module
to make the contents of the LCD image more legible.
Download the ![]() RCX_image robofile to see the steps
and more about the modules used.
RCX_image robofile to see the steps
and more about the modules used.
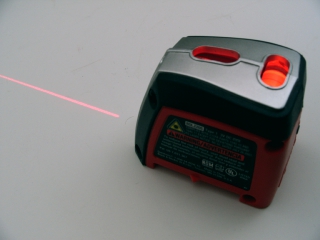
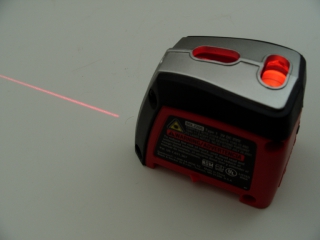 Laser Leveller original image. Background
is dark but we want to keep the laser light.
Laser Leveller original image. Background
is dark but we want to keep the laser light.
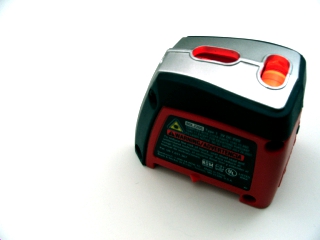
 Using the
Color Balance
fixes the color distortion that would be more apparent when Normalized. The overall image appears less yellow.
Using the
Color Balance
fixes the color distortion that would be more apparent when Normalized. The overall image appears less yellow.
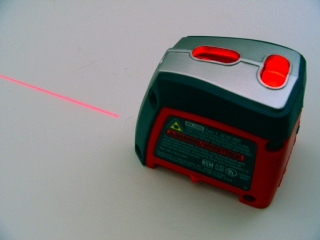
 Using the
Normalize module
fixes the lighting but loses the laser light since the red color gets removed from the normalization process.
Using the
Normalize module
fixes the lighting but loses the laser light since the red color gets removed from the normalization process.
 Instead we first use the
Hue module
that increases the laser color. Laser light typically overpowers a camera's pixels and produces more of a white
light which is why the normalization process removes the line. Using the Hue module will increase that color. Note how
much more red the laser light appears.
Instead we first use the
Hue module
that increases the laser color. Laser light typically overpowers a camera's pixels and produces more of a white
light which is why the normalization process removes the line. Using the Hue module will increase that color. Note how
much more red the laser light appears.
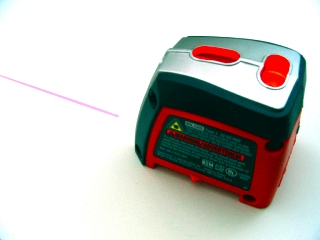 After the hue module we can rerun the
Normalize module which now produces a good background with the red laser light. Also
note how the red part of the leveller is also more pronounced.
After the hue module we can rerun the
Normalize module which now produces a good background with the red laser light. Also
note how the red part of the leveller is also more pronounced.
Download the ![]() Laser_image robofile to see the steps
and more about the modules used.
Laser_image robofile to see the steps
and more about the modules used.
The End
That's all folks. We hope you've enjoyed this little adventure into an application of machine vision processing. If you have any questions or comments about this tutorial please feel free to contact us.
Have a nice day!
| New Post |
| Fixing Photos Related Forum Posts | Last post | Posts | Views |
| None |