
Joystick Driving
![]() Download the Joystick drive robofile.
Download the Joystick drive robofile.
- This demo allows you to steer the Roomba using an attached joystick. This works best with the Joystick plugged into the
onboard Netbook but can also work with a PC computer (like your desktop) connect to the Roomba with a long serial cable. Using on
onrobot Netbook will allow you more mobility as you move the robot around.
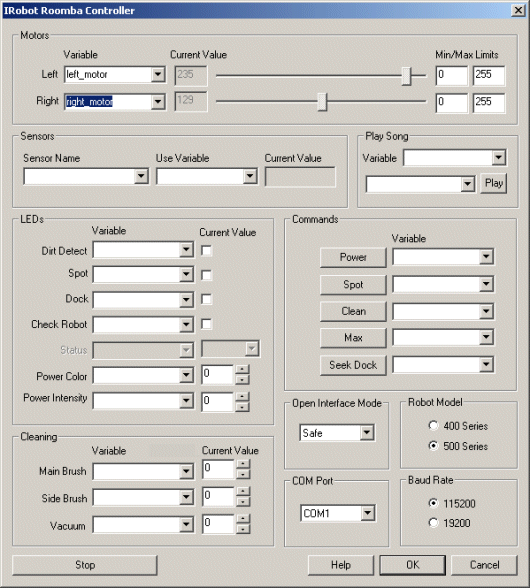 First double click on the
Roomba module in the processing pipeline and change the serial COM port
to the one you are using. Note that if you happen to have a serial port on your Netbook then the COM port will most likely be from COM1 to COM4. If you are using
a USB to serial converter then it can be a much higher number. RoboRealm will only display those COM ports that are active within the system
so the COM port selection should be limited to only a few selections. If you are not sure on which COM port is being used start with the highest one and
test while moving to lower ones.
First double click on the
Roomba module in the processing pipeline and change the serial COM port
to the one you are using. Note that if you happen to have a serial port on your Netbook then the COM port will most likely be from COM1 to COM4. If you are using
a USB to serial converter then it can be a much higher number. RoboRealm will only display those COM ports that are active within the system
so the COM port selection should be limited to only a few selections. If you are not sure on which COM port is being used start with the highest one and
test while moving to lower ones.
If you have already configured the Roomba in a previous robofile then the COM port should already be configured for your robot assuming the "Remember as default" checkbox in the Roomba GUI interface is set.
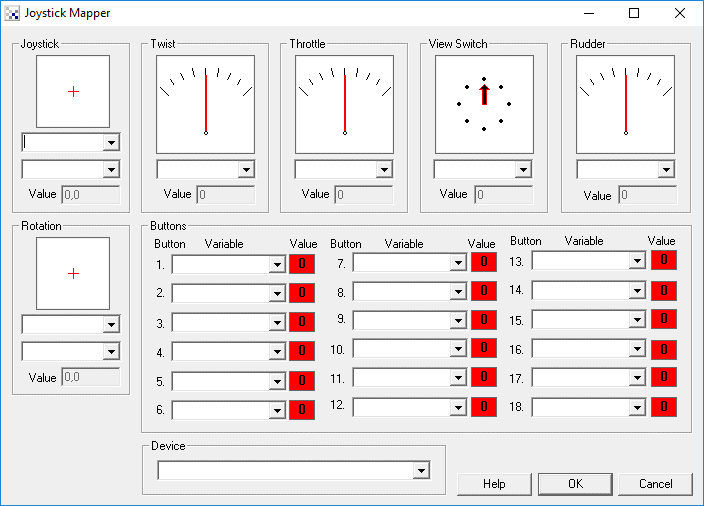 Once you have the right COM port set
ensure that you have a joystick connected to your PC and double click on the Joystick module and select your joystick device in that GUI interface. If configured correctly you
should see the gauges move in that interface in response to your joystick movements. You should also notice that the
Roomba is also moving based on your joystick commands.
Once you have the right COM port set
ensure that you have a joystick connected to your PC and double click on the Joystick module and select your joystick device in that GUI interface. If configured correctly you
should see the gauges move in that interface in response to your joystick movements. You should also notice that the
Roomba is also moving based on your joystick commands.
If you forgot to plug in a joystick and have the Joystick GUI screen open, close it by pressing Ok, and then re-edit that module. The joystick dropdown selection list show now show your joystick.
 The joystick module is responsible for reading the movements of your first
joystick handle which will translate the Roomba forward, backward, left and right.
The buttons on the joystick also perform the following actions:
The joystick module is responsible for reading the movements of your first
joystick handle which will translate the Roomba forward, backward, left and right.
The buttons on the joystick also perform the following actions:
Button 1 - play a song
Button 2 - switch on main brush
Button 3 - switch on side brush
Button 4 - switch on vacuum
Button 5 - move forward until bump triggered
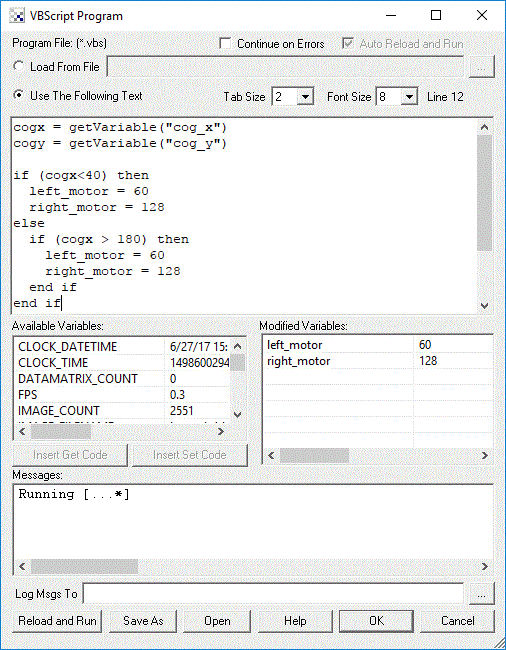
These buttons and joystick values are interpreted by the VBScript module to set the "left_motor" and "right_motor" variables to the correct value.
- Double clicking on any module brings up that modules interface. You can explore what each module does by viewing its interface.