
XIMEA Camera
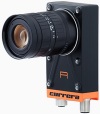
The XIMEA Camera module provides access to the XIMEA line of cameras that use the M3API protocol. XIMEA produces a range of high quality cameras for use in industrial machine vision applications. One of their latest cameras, the CURRERA RL13, is innovating the way smart cameras are created by combining high end optics with an embedded PC capable of running Microsft Windows all in a small compact package. This environment makes a great host for the RoboRealm application when industrial solutions are desired.The module will connect RoboRealm via the M3API to the connected camera. You must have downloaded the m3Api.dll and associated .TM files and placed them in the RoboRealm folder (this is typically c:\program files\RoboRealm\). If the DLL is missing RoboRealm will alert you to that situation. If the .TM files are missing, upon executing the XIMEA module the RoboRealm application will abruptly exit without warning.
Interface
Instructions
1. Device Selection - If you have connected your XIMEA camera to your computer you should see one or more devices listed in the Device dropdown. You can select the appropriate camera to connect to. Once selected the Mode list will update and provide you with various image sizes from which to select from. Finally, you can chose the color format that you wish to use.
2. Mode -
3. Color Filters - This allows you to select between gray and color modes.
4. ROI - Should you not need the entire image you can crop the image to a specified size. Note that the coordinates are specified as origin x,y and destination x,y.
5. LED settings - Specifies how the corresponding LED should be triggered.
LED_LINK_HB - set led to blink if link is ok (led 0), heartbeat (led 1)
LED_TRIGGER - set led to blink if trigger detected
LED_EXT_EVENT - set led to blink if external signal detected
LED_STREAMING - set led to blink if data streaming
LED_INTEGRATION - set led to blink if sensor integration time
LED_ISACQ - set led to blink if device busy/not busy
LED_NIC - set led to blink if link is ok
LED_ZERO - set led to zero
LED_ONE - set led to one
6. GPIO - Specifies how the input and output lines should be handled.
SET_TRIGGER - set gpi to trigger input SET_EXT_EVENT - set gpi to input external event SET_INPUT_OFF - set gpi off
For GPO pins you can select a variable that contains or will contain a value to send to the GPO pins. Note that you can either select an existing variable or type in a new variable. The variable should contain one of the following string values or the ordered numerical equivalent (0-5)
SET_ZERO - set gpo to zero SET_ONE - set gpo to one SET_STROBE_OUT - set gpo to output "strobe out" signal (device busy) SET_STROBE_OUT_INV - set gpo to output inverted "strobe out" (device busy) SET_STROBE_OUT_INT - set gpo to output "strobe out" signal (integration) SET_STROBE_OUT_INT_INV - set gpo to output inverted "strobe out" (integration)
7. White Balance - If your acquired image's white areas appear to be tinted in a certain color you can use the White Balance values to move the image's white areas away from a colored tint.
8. Camera Options - Use the selections to change the Camera parameters on how the image is acquired. These parameters will change the behavior of the cameras capture parameters and thus are more powerful in attaining a better image than performing the same task in software. Note that GammaY and GammaC are another name for Brightness and Saturation values but are instead sent to the camera hardware to operate on a pixel acquisition rather than performing the task in software.
Note that changing certain parameters like the Exposure will increase the length of time an image requires to be created and thus will slow down the frame rate (fps). Should you require a fast exposure attempt to use the Gain or Brightness controls to provide a satisfactory image while maintaining a faster fps.
9. Exposure - refers to how long your camera takes to record an image. In a well-lit scene, exposure times can be very short because plenty of light is available stimulate the CCD pixels with enough energy to record an image. At nighttime, exposure time will increase dramatically due to the near absence of light. A quick exposure time will also reduce motion blur, whereas a slow will introduce more blur if the object is moving.
10. Gain - refers to the amplitude or magnification of the incoming video. Higher gain levels result in greater levels of brightness and contrast. Lower levels of gain will darken the image, and reduce the contrast. Essentially, gain modification affects the sensitivity to light of the CCD sensors. This concept is analogous to the ISO or ASA ratings of silver halide films in digital cameras.
11. Sharpness - refers to the amount of edge definition or crispness in an image. The sharpness control can be used to smooth out rough edges.
12. Gamma Y - refers to the adjustment of intensity values of a pixel to affect how bright the image appears.
13. Gamma C - refers to the adjustment of red, green, or blue values of a pixel to affect how bright the image appears.
14. Color Correction - Once the image is acquired you can alter the image in software to produce a more pleasing result. Use the sliders and/or spin boxes to change the saturation (color), brightness (intensity) or contrast (spread) of the image. Note that these alter pixel values AFTER being acquired from the camera.
15. Saturation - refers to the intensity of the colors, i.e. how red a red color is. By decreasing the saturation of an image you remove color and produce a monochrome grayscale picture that represents only darkness and brightness, or luminance. Increasing saturation in an image produces artificially intense colors.
16. Brightness - refers to an intensity or luminosity scale that ranges from totally black to totally white and has no effect on color values.
17. Contrast - refers to how far pixel values can deviate from gray. The higher the contrast the more black and white and image appears. The lower the contrast the more gray an image appears.
For more information
XIMEA
| New Post |
| XIMEA_Camera Related Forum Posts | Last post | Posts | Views |
| None |